Edit Actions
Justuno’s Advanced Workflow Actions allow you to further refine customer journeys by integrating external data, syncing visitor actions with third-party apps, and dynamically updating user profiles. These advanced tools help create highly personalize
At a Glance
Introduction
Advanced Workflow Actions extend the capabilities of Justuno’s workflow automation by enabling deeper customization and external integrations. These actions are particularly useful for businesses that need real-time data syncing, advanced segmentation, and personalized visitor interactions across multiple workflows.
Configuring Advanced Workflow Actions
To add and configure an advanced action:
- Drag and drop the desired Advanced Action from the left panel into your workflow.
- Define the settings for that action (e.g., API endpoint, segment selection, custom code).
- Connect it to the next step to ensure seamless automation.
- Save and activate the workflow to implement your automation.
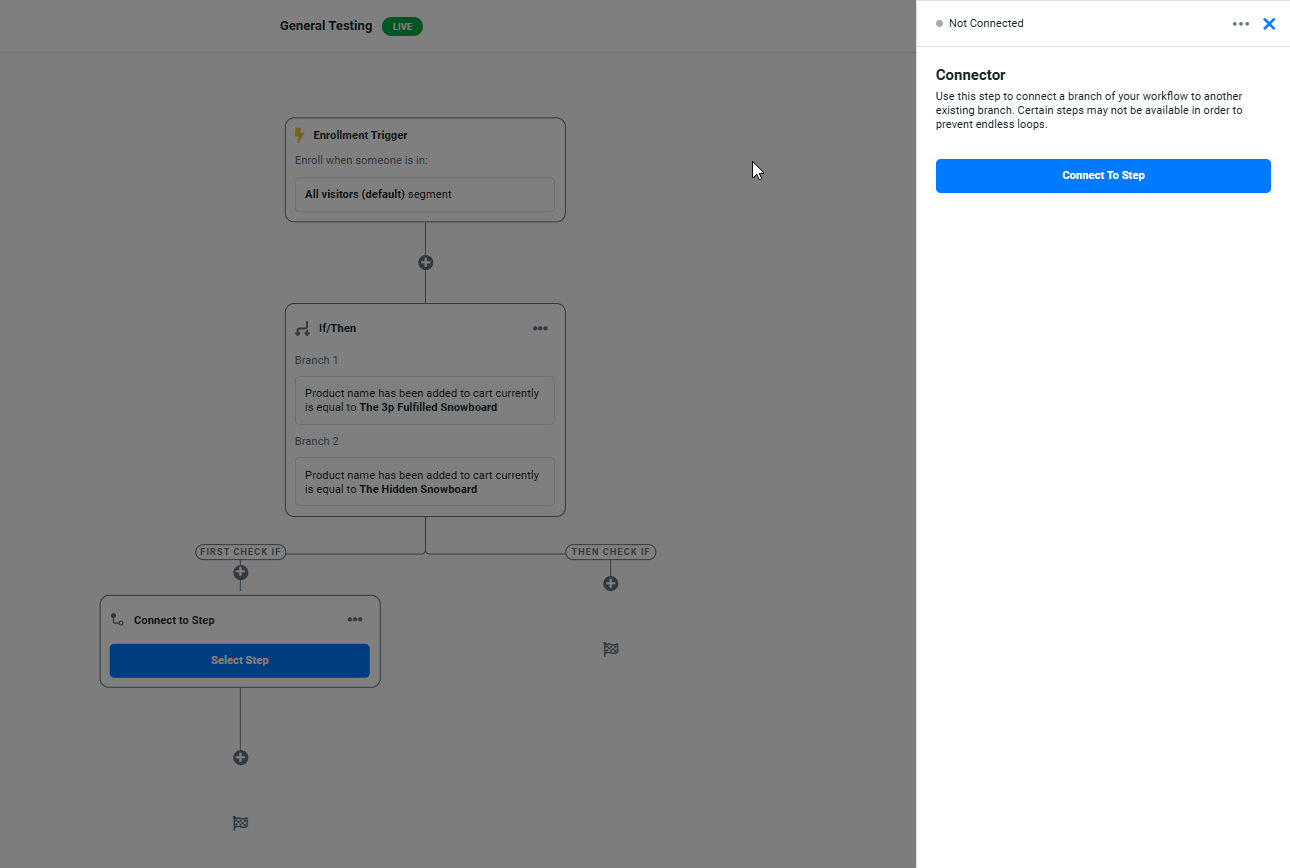
Connect to Step
Links a workflow branch to another step within the workflow.
- Allows workflows to remain flexible by connecting different branches without duplication.
- Prevents endless loops by restricting certain step connections.
Example Use Case: If a visitor abandons their cart, connect them to a follow-up workflow that sends a reminder after 30 minutes.
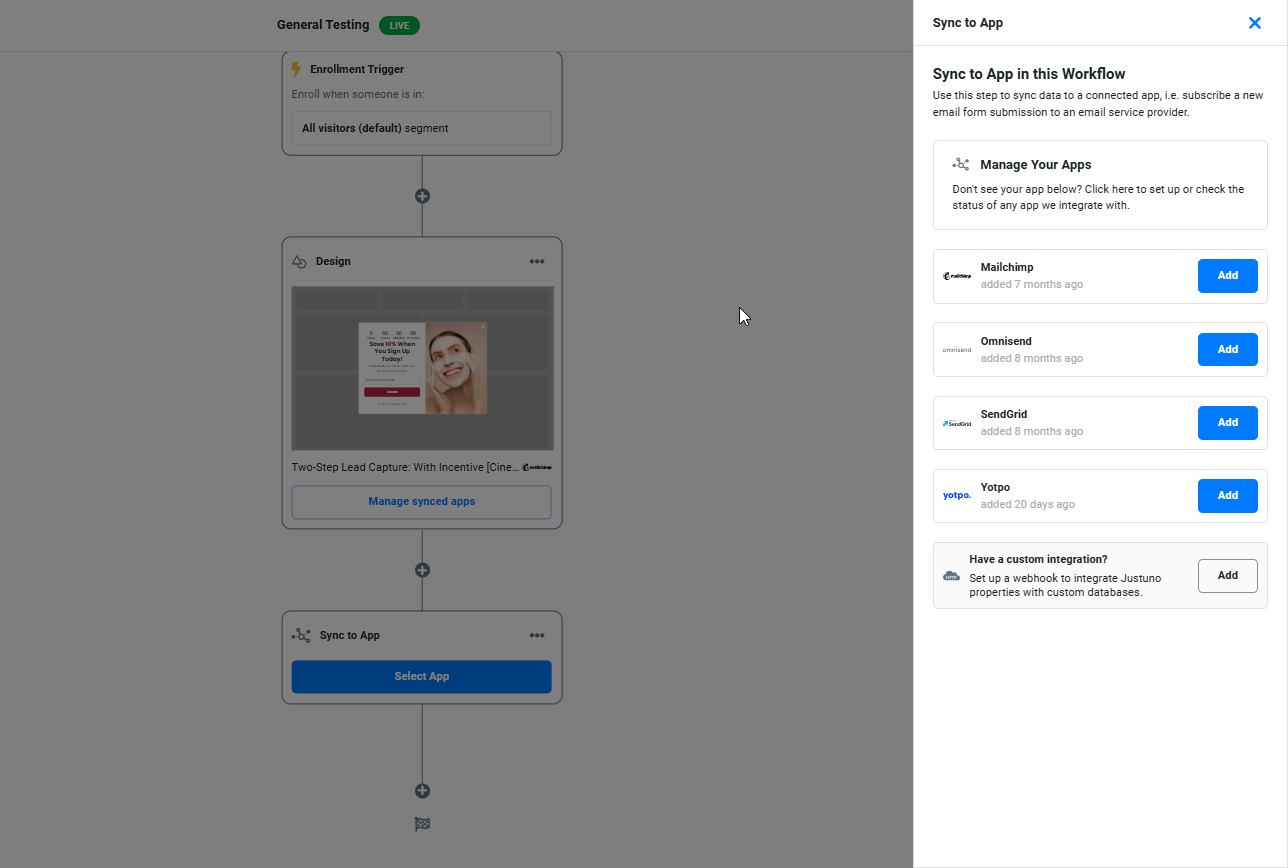
Sync to App
Sends visitor data to an integrated third-party app.
- Syncs customer actions with an ESP, CRM, SMS provider, or API connection.
- Allows real-time updates for email lists, customer profiles, and analytics platforms.
Example Use Case: Automatically send a new lead’s email data to Klaviyo or Mailchimp for follow-up campaigns.
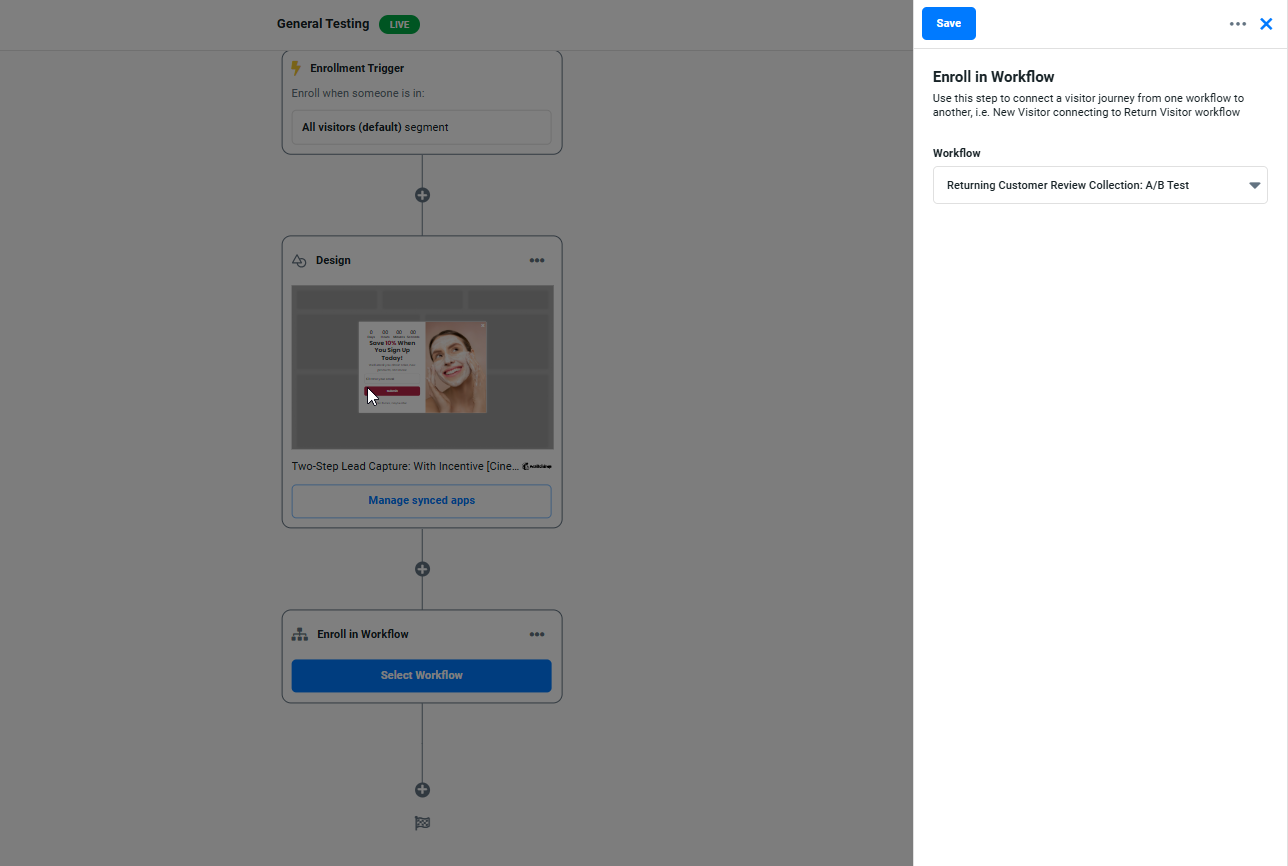
Enroll in Workflow
Moves a visitor from one workflow to another for multi-step engagement.
- Allows seamless progression from one journey to another based on user behavior.
- Helps maintain engagement with long-term visitors.
Example Use Case: Enroll first-time visitors into a "New Customer Nurture" workflow, then transition them to a "Loyalty Retargeting" workflow after their first purchase.
Add to Segment
Adds or removes a visitor from a predefined audience segment.
- Helps create targeted experiences based on visitor engagement.
- Enables personalized messaging by adjusting visitor lists dynamically.
Example Use Case: Add users who viewed multiple product pages to a "High-Intent Shoppers" segment for targeted promotions.

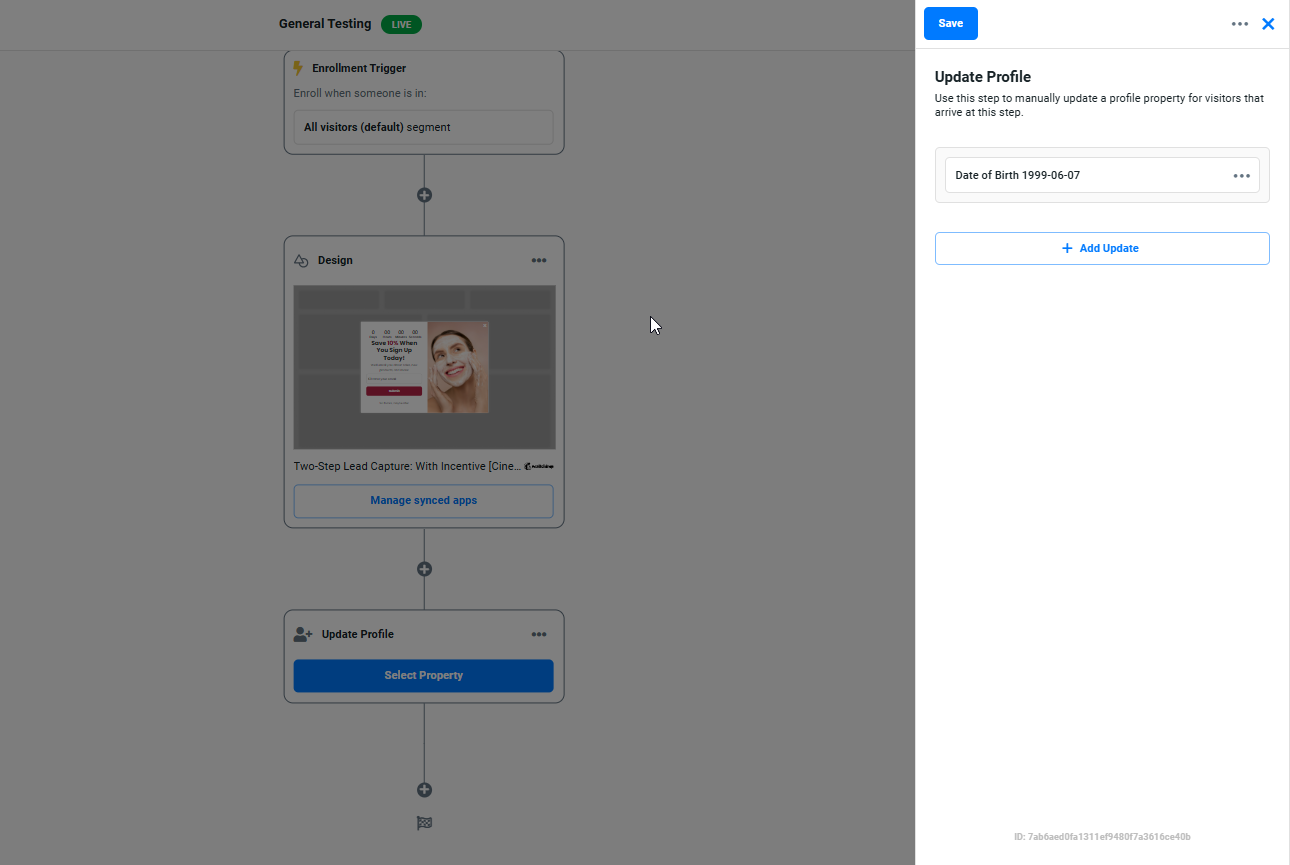
Update Profile
Modifies a visitor’s profile data based on workflow interactions.
- Tracks visitor preferences, attributes, and behavior changes.
- Supports custom audience building with detailed visitor insights.
Example Use Case: Store a visitor’s birthday to trigger an exclusive offer on their special day.
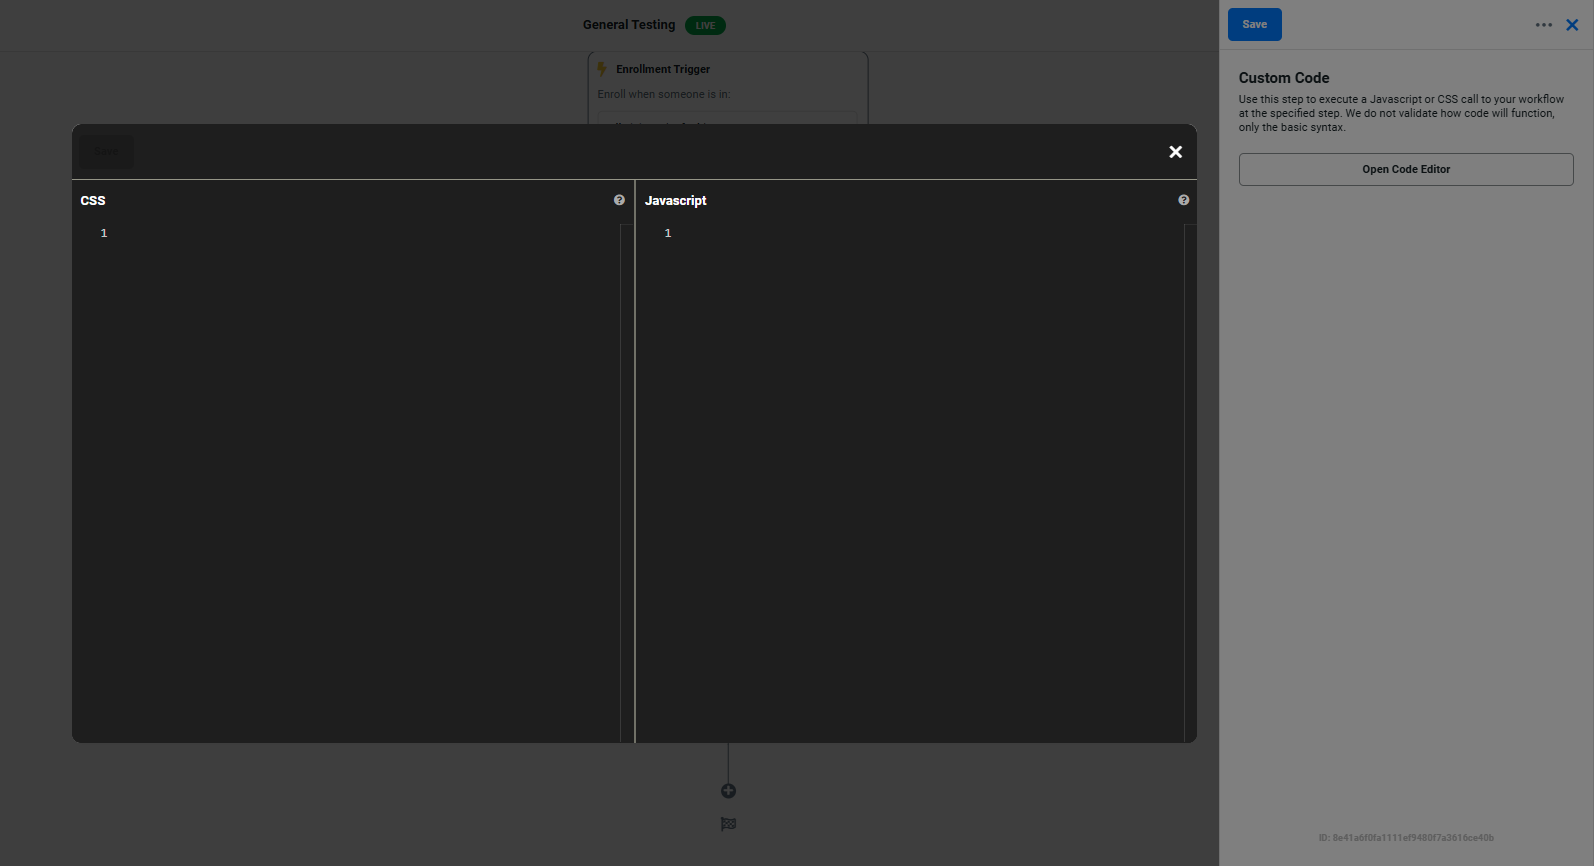
Code
Executes custom HTML or JavaScript at a specific workflow step.
- Allows deep customization within workflows.
- Can modify visitor experiences based on advanced scripting.
Example Use Case: Use JavaScript to track a visitor’s referral source and display a relevant promotion.
Now that you've explored Advanced Workflow Actions, optimize your automation strategy by integrating webhooks, API connections, and custom scripting for deeper personalization.
Need to revisit Update Actions? See Update Actions Article