Timer Element
In this Justuno support article, we walkthrough how to add and edit a Themed Timer element in the Justuno Design Studio.
At a glance:
Last updated: 03/24/2025
Introduction
Incorporating a timer into your design can create a sense of urgency for limited-time events, offers, or promotions, which often leads to higher opt-ins and conversions.

Add & Edit
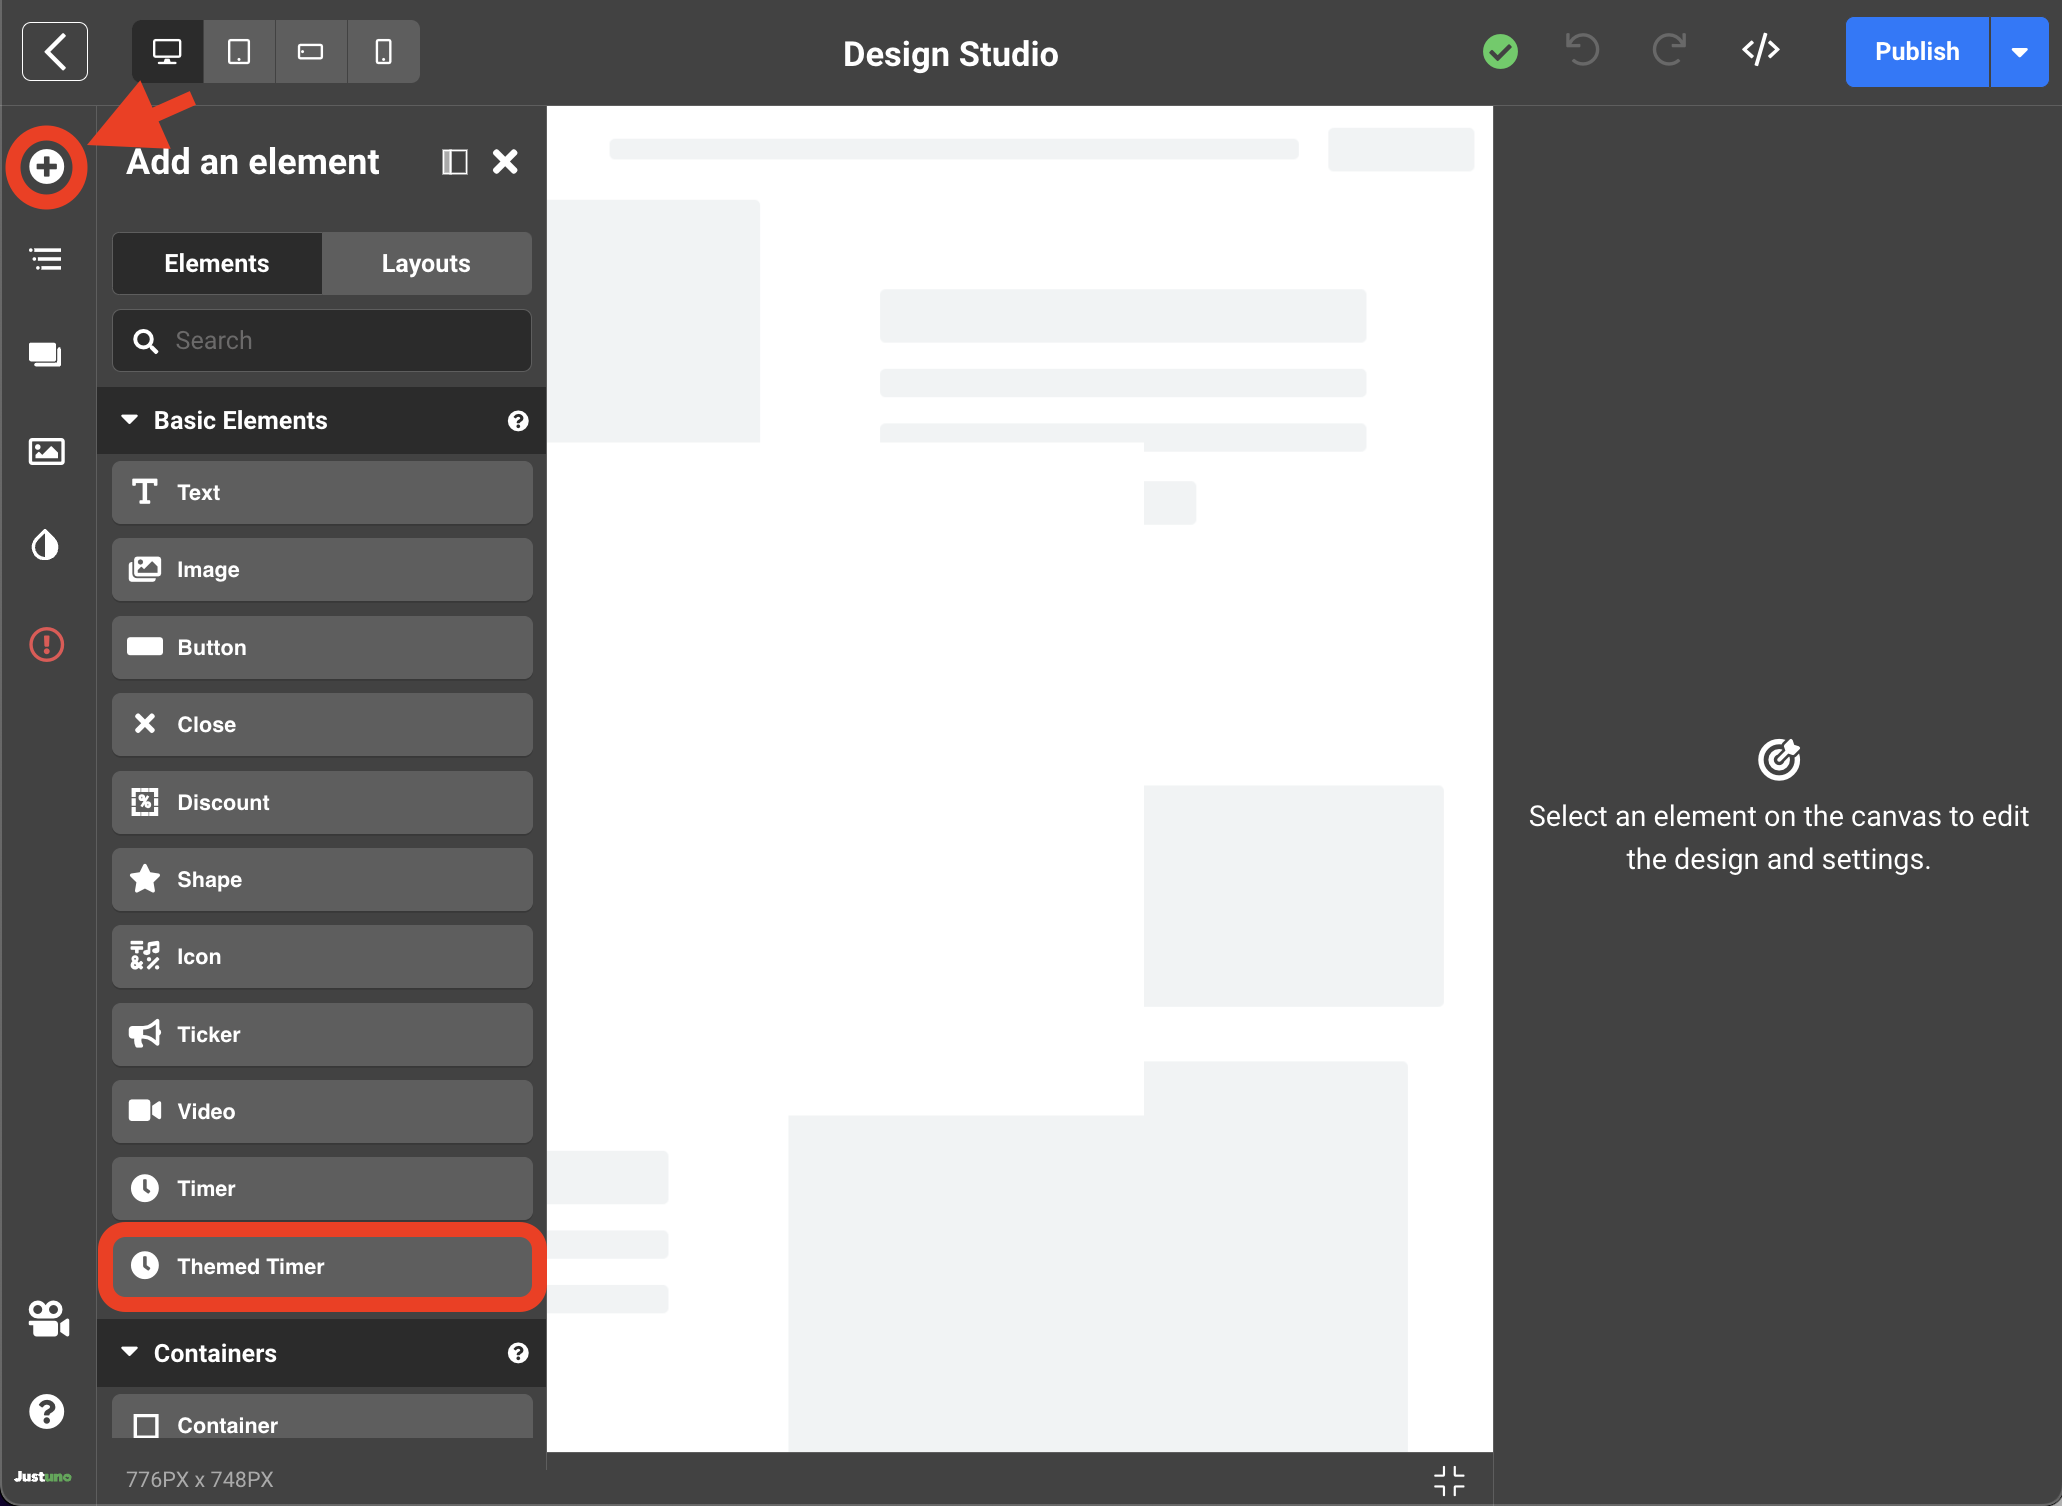
To add a timer element to your design, start by clicking the add element icon on the left sidebar. This will open up the element menu where you will find Themed Timer. Click and drag the Themed Timer into the desired area in your design canvas.

NOTE: Alternatively you may choose to use the Timer element. This bare bones timer element allows experienced designers to adjust each individual container in the timer.

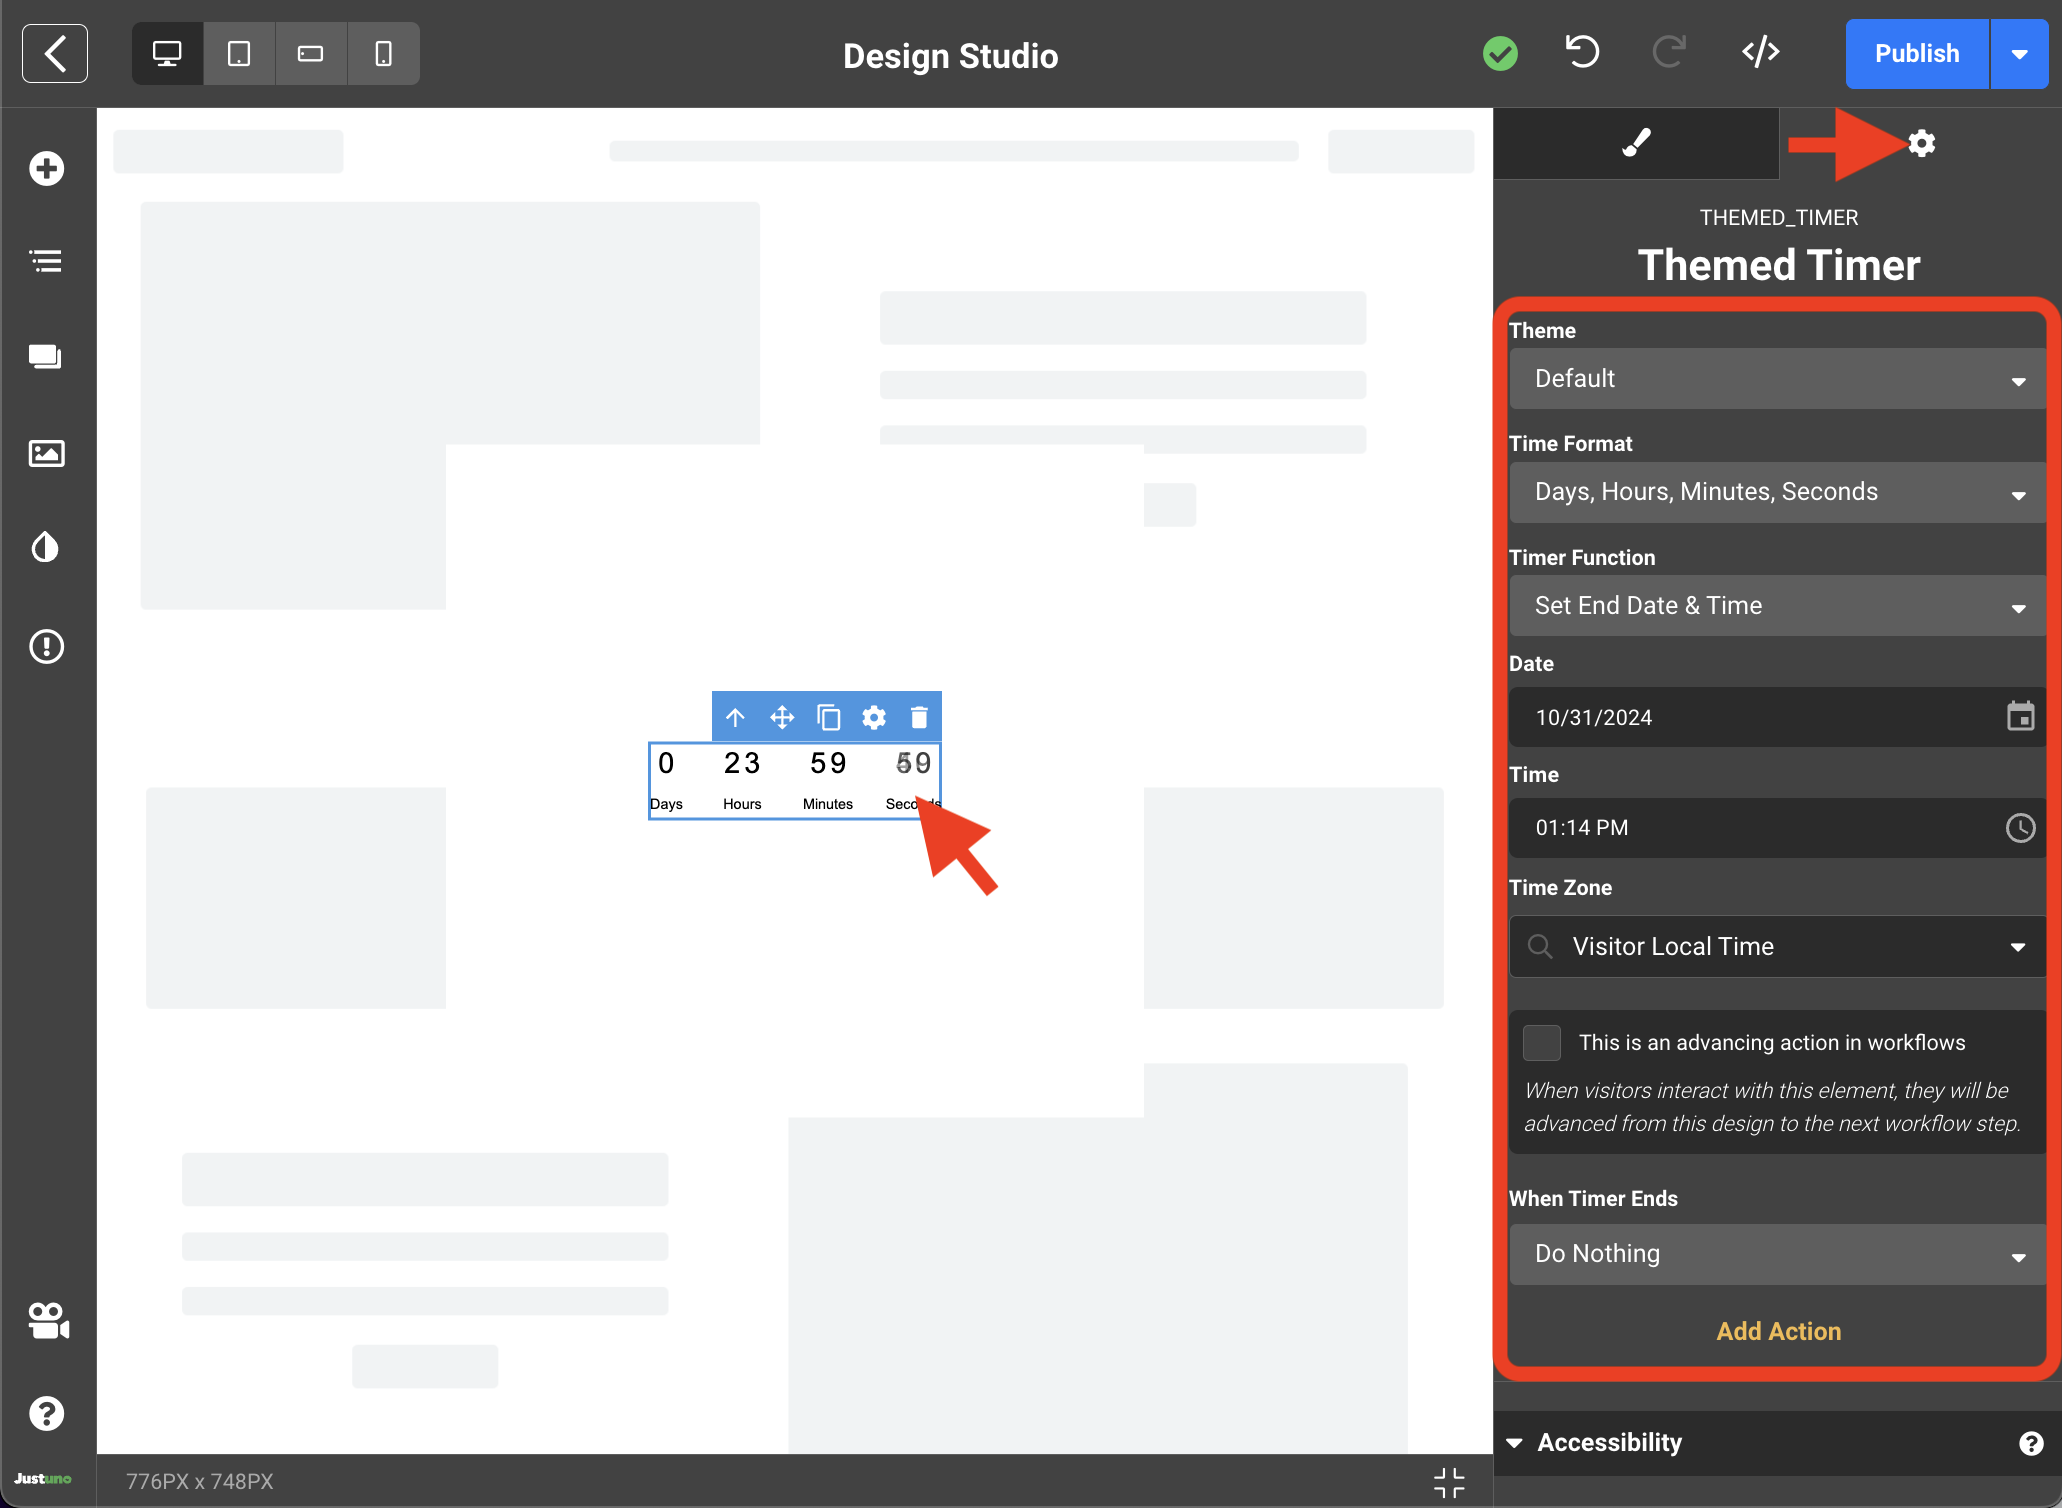
To edit the Themed Timer, select it on your design canvas and click on the settings icon on the right sidebar. Here you will find an array of adjustments to personalize your timer.

Theme - Browse and select from our library of pre-built timer skins.
Time Format - Choose what increments of time are shown (i.e. seconds, minutes, hours...).
Timer Function - Select between three functions: show a set end date/time, countdown from a specified amount of time or reset daily (variation of countdown that resets daily). Depending on the function chosen, you will see inputs for date, time, timezones and or time increments.
When Time Ends - Desired action you wish to deploy when timer depletes (e.g. close design).
Custom JavaScript, Days Left Until Specific Date
Show days left until a specific date using JavaScript—By adding these simple lines of code, you can replace the # symbol in the text layer with the number of days remaining until your chosen date. Perfect for promotional banners, limited-time offers, or event countdowns.
Code from the video below:
<script>
// Countdown function — updates the number of days left until a specific date
function updateCountdown() {
  // Set the target date/time (April 8, 2025, end of day)
  const targetDate = new Date('2025-04-08T23:59:59');

  // Current date/time
  const now = new Date();

  // Difference in milliseconds
  const diff = targetDate - now;

  // Convert milliseconds → full days (rounding up to include partial days)
  const daysRemaining = Math.ceil(diff / (1000 * 60 * 60 * 24));

  // Prevent negative numbers after the date passes
  const displayDays = Math.max(daysRemaining, 0);

  // Find the element with class "day" and update its content
  const dayElement = document.querySelector('.day');
  if (dayElement) {
    dayElement.textContent = displayDays;
  }
}

// Run when DOM is fully loaded
document.addEventListener('DOMContentLoaded', updateCountdown);
</script>
