Sync Profile Properties to Alloy Automation
This Justuno article will cover how to sync profile properties to Alloy Automation via Justuno webhooks
At a glance:
Introduction
Alloy automation is a workflow automation platform to sync and process data between hundreds of different apps. Utilizing webhooks by Alloy and Justuno's own webhooks, our customers can sync profile properties through Alloy to 200+ different apps.
Setup Alloy's Webhook to receive data
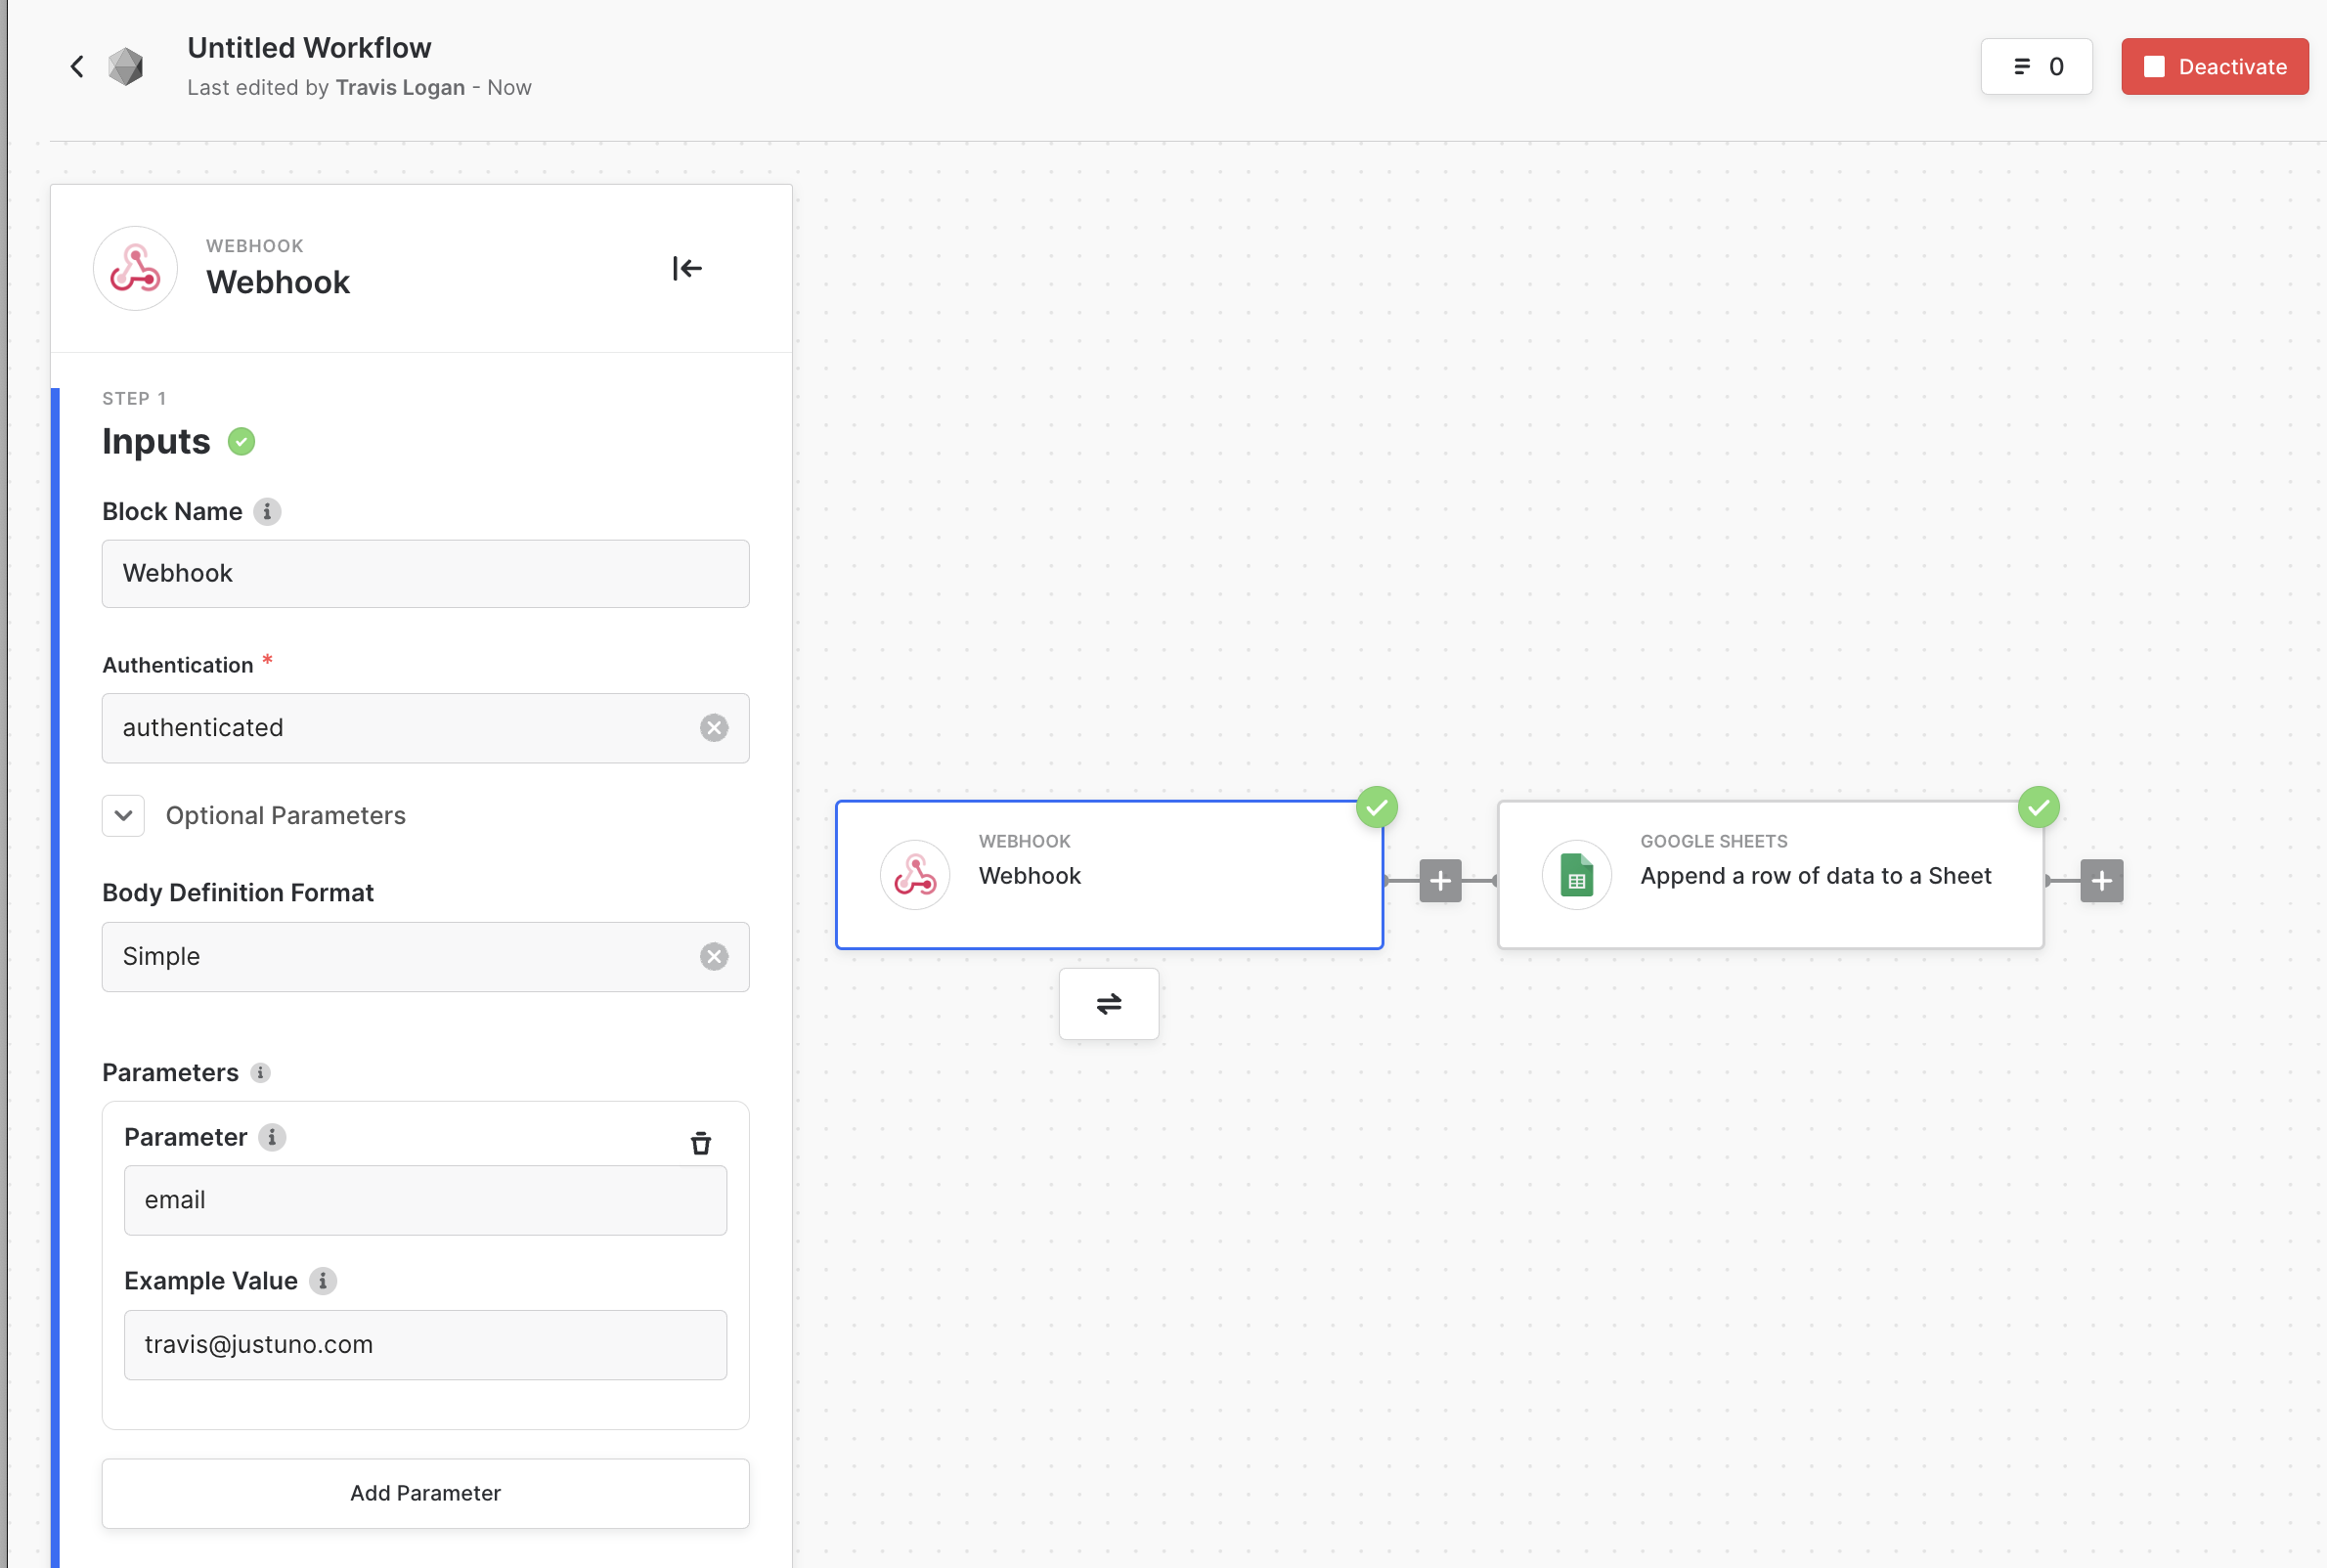
- Create a new Webhook inside the Alloy account.

-
You’ll be prompted to select a form of authentication: Alloy supports API Key authentication and you also have the option to have no authentication.
Note: For security reasons, you should have some form of authentication if you’re planning on accessing sensitive information in your workflow.
-
Select the Simple from the Body Definition Format dropdown.
- Add parameters and an example value for each profile property you expect to send to Alloy.
- Once you click the Next/Proceed button, you will be presented with the unique webhook URL.
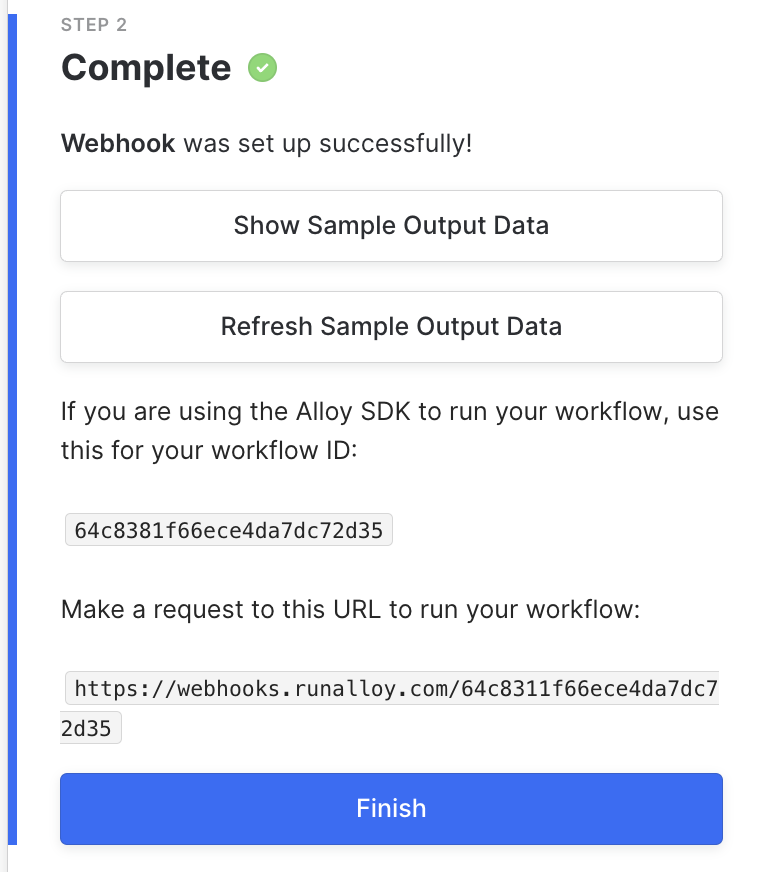
- Make a note of the webhook URL here. We will use this in the Justuno Webhook settings.
Don't forget to activate your Alloy workflow as that will be necessary to successfully test.
Create Justuno webhook
In your Justuno portal, edit your workflow where you want to create your webhook call. You have two options within the Justuno workflow editor to create webhooks. You can create a standalone webhook step or you can attach a webhook to a form submit on a design step. We are going to focus on ladder of the two.
It's far more common to sync apps via a form submission on a design step rather than on their own dedicated step. This is because most of the time when you want to sync profile property data to an app, you want it to happen instantly on form submit rather than when they move forward to a new workflow step to do so. However there are certainly use cases for the alternative.
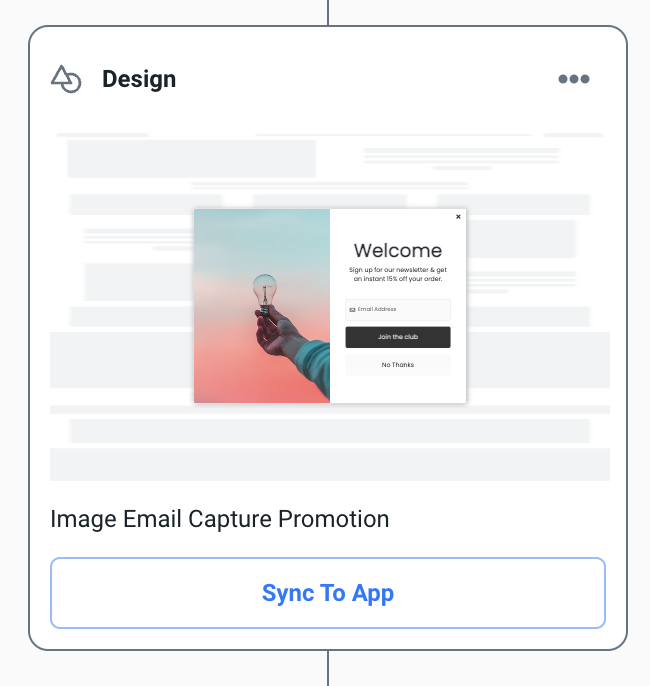
Once you have a design step that is attached to a design with a form and at least one button with a click action set to form submit, your design step will have a sync app button revealed.
Click the Sync To App button
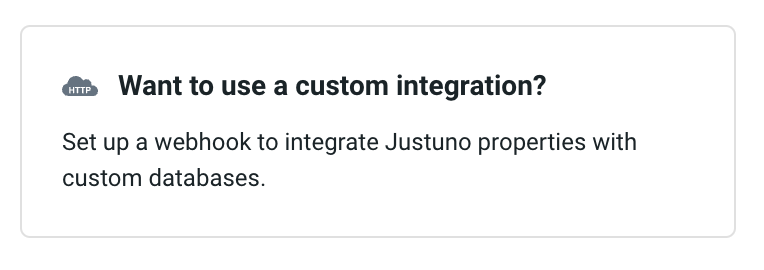
Next click the Want to use a custom integration? button
 If your account hasn't had the HTTP client app added yet, go ahead and click to add that now and follow the prompts.
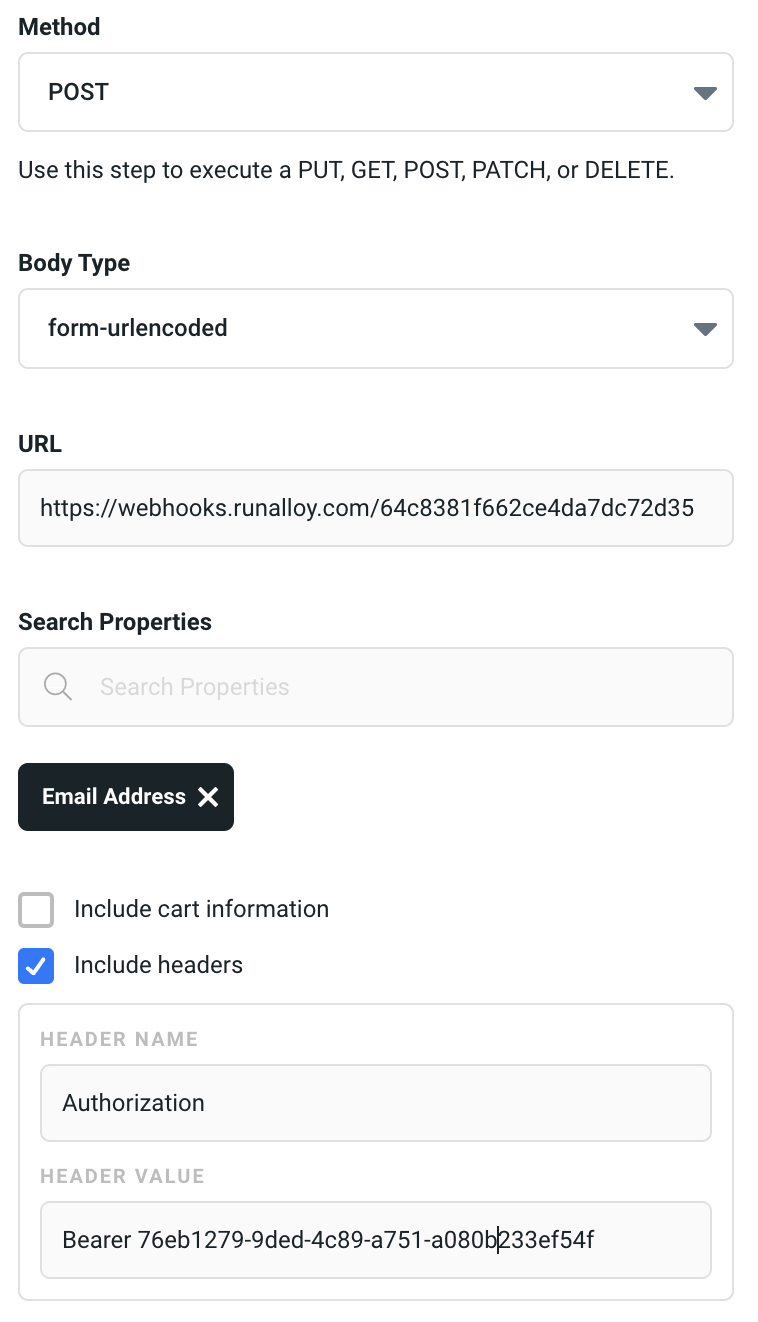
Set the following parameters:
Method
Post
Body Type
form-urlencoded
URL https://webhooks.runalloy.com/....
This is the Alloy webhook URL that was provided by Alloy above.
Search Properties
Search & Add Email and other profile properties you wan to push to Alloy.
Include cart information
uncheck
Include headers
check and add a header name of Authorization and enter Bearer [your allow api-key]
Click the vertical ellipsis icon at the top right of the webhook settings drawer and then click the Test Webhook button. It should tell you that the webhook was sent successfully.