Partner Page & Templates
This Justuno support article will provide instructions on how to create/edit a Partner Page and how to add templates to it.
At a glance:
Last updated: 03/19/2025
Introduction
As a Justuno Partner, you have the ability to save and repurpose any designs and workflows created in your account(s) as templates for use in other accounts. These templates can be shared publicly through the Justuno Template Library, either for free or gated, making them accessible to all Justuno users.
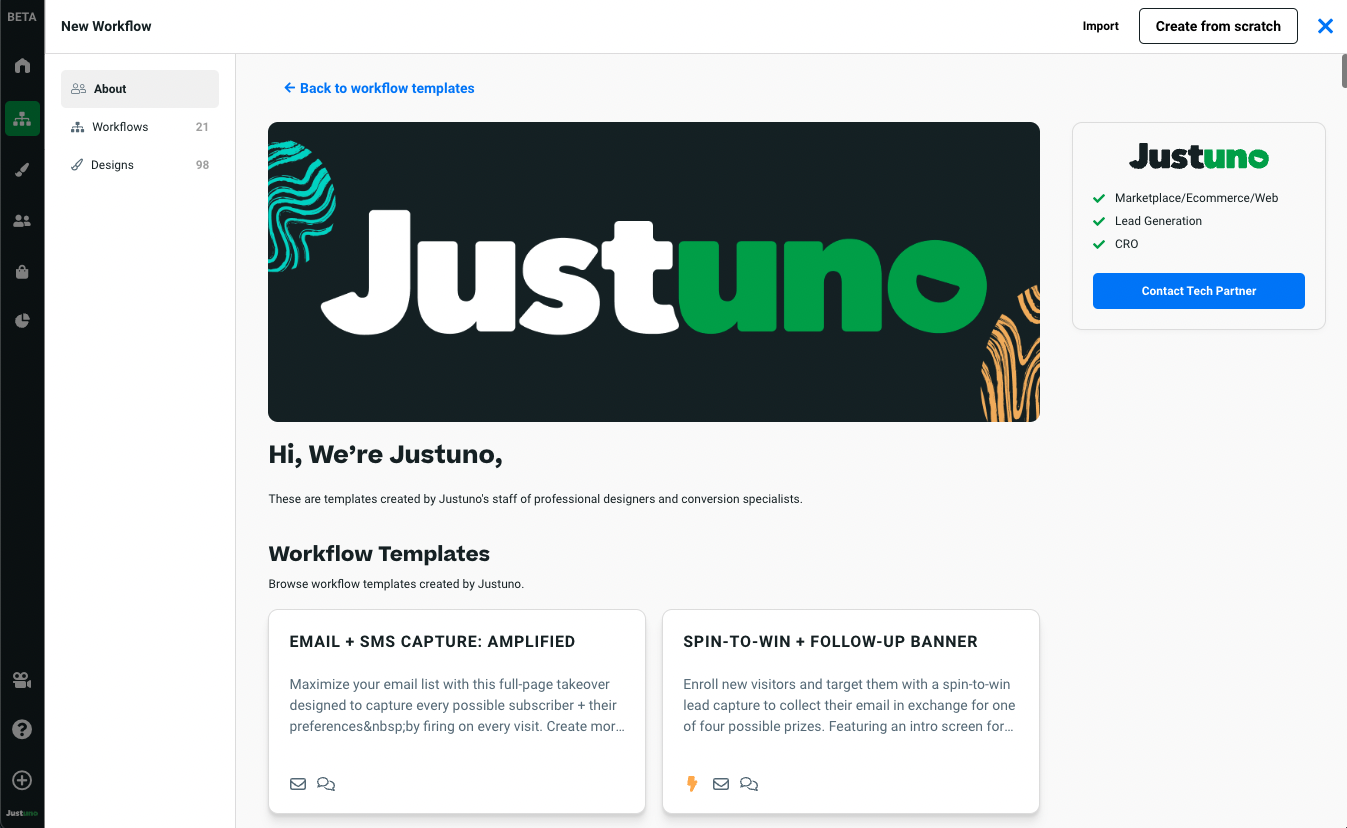
Each public template includes a link to your personalized Partner Page, where you can showcase your bio, services, and contact details.
Together, your Partner Templates and Partner Page create valuable opportunities for lead generation for you and your company.
NOTE: The features below are only available on Partner & Enterprise level accounts.
Benefits/Tips
There are many benefits to creating partner templates in the Justuno platform, here are just a few of the reasons why you should too:
- Leads: If you choose to make your templates gated, you'll immediately receive the contact information of every account that uses your template. Plus you can always go export your leads in the Enterprise Hub.
(1).png)
- Exposure: Even if you choose not to make your templates gated, there is a link to your website on your partner page that can drive leads as well.
- Efficiency: Rather than re-make campaigns in each account, simply use templates to drop in your top-performing strategies as you onboard new clients/customers.
- Learn about these and all the other benefits of being a Justuno partner in our partner portal!
When deciding on what your templates will be we recommend creative strategies, industry-specific designs or use cases, incorporating other technologies, etc. to make your template stand out and increase usage!
Partner Page
To create and personalize your Partner Page:
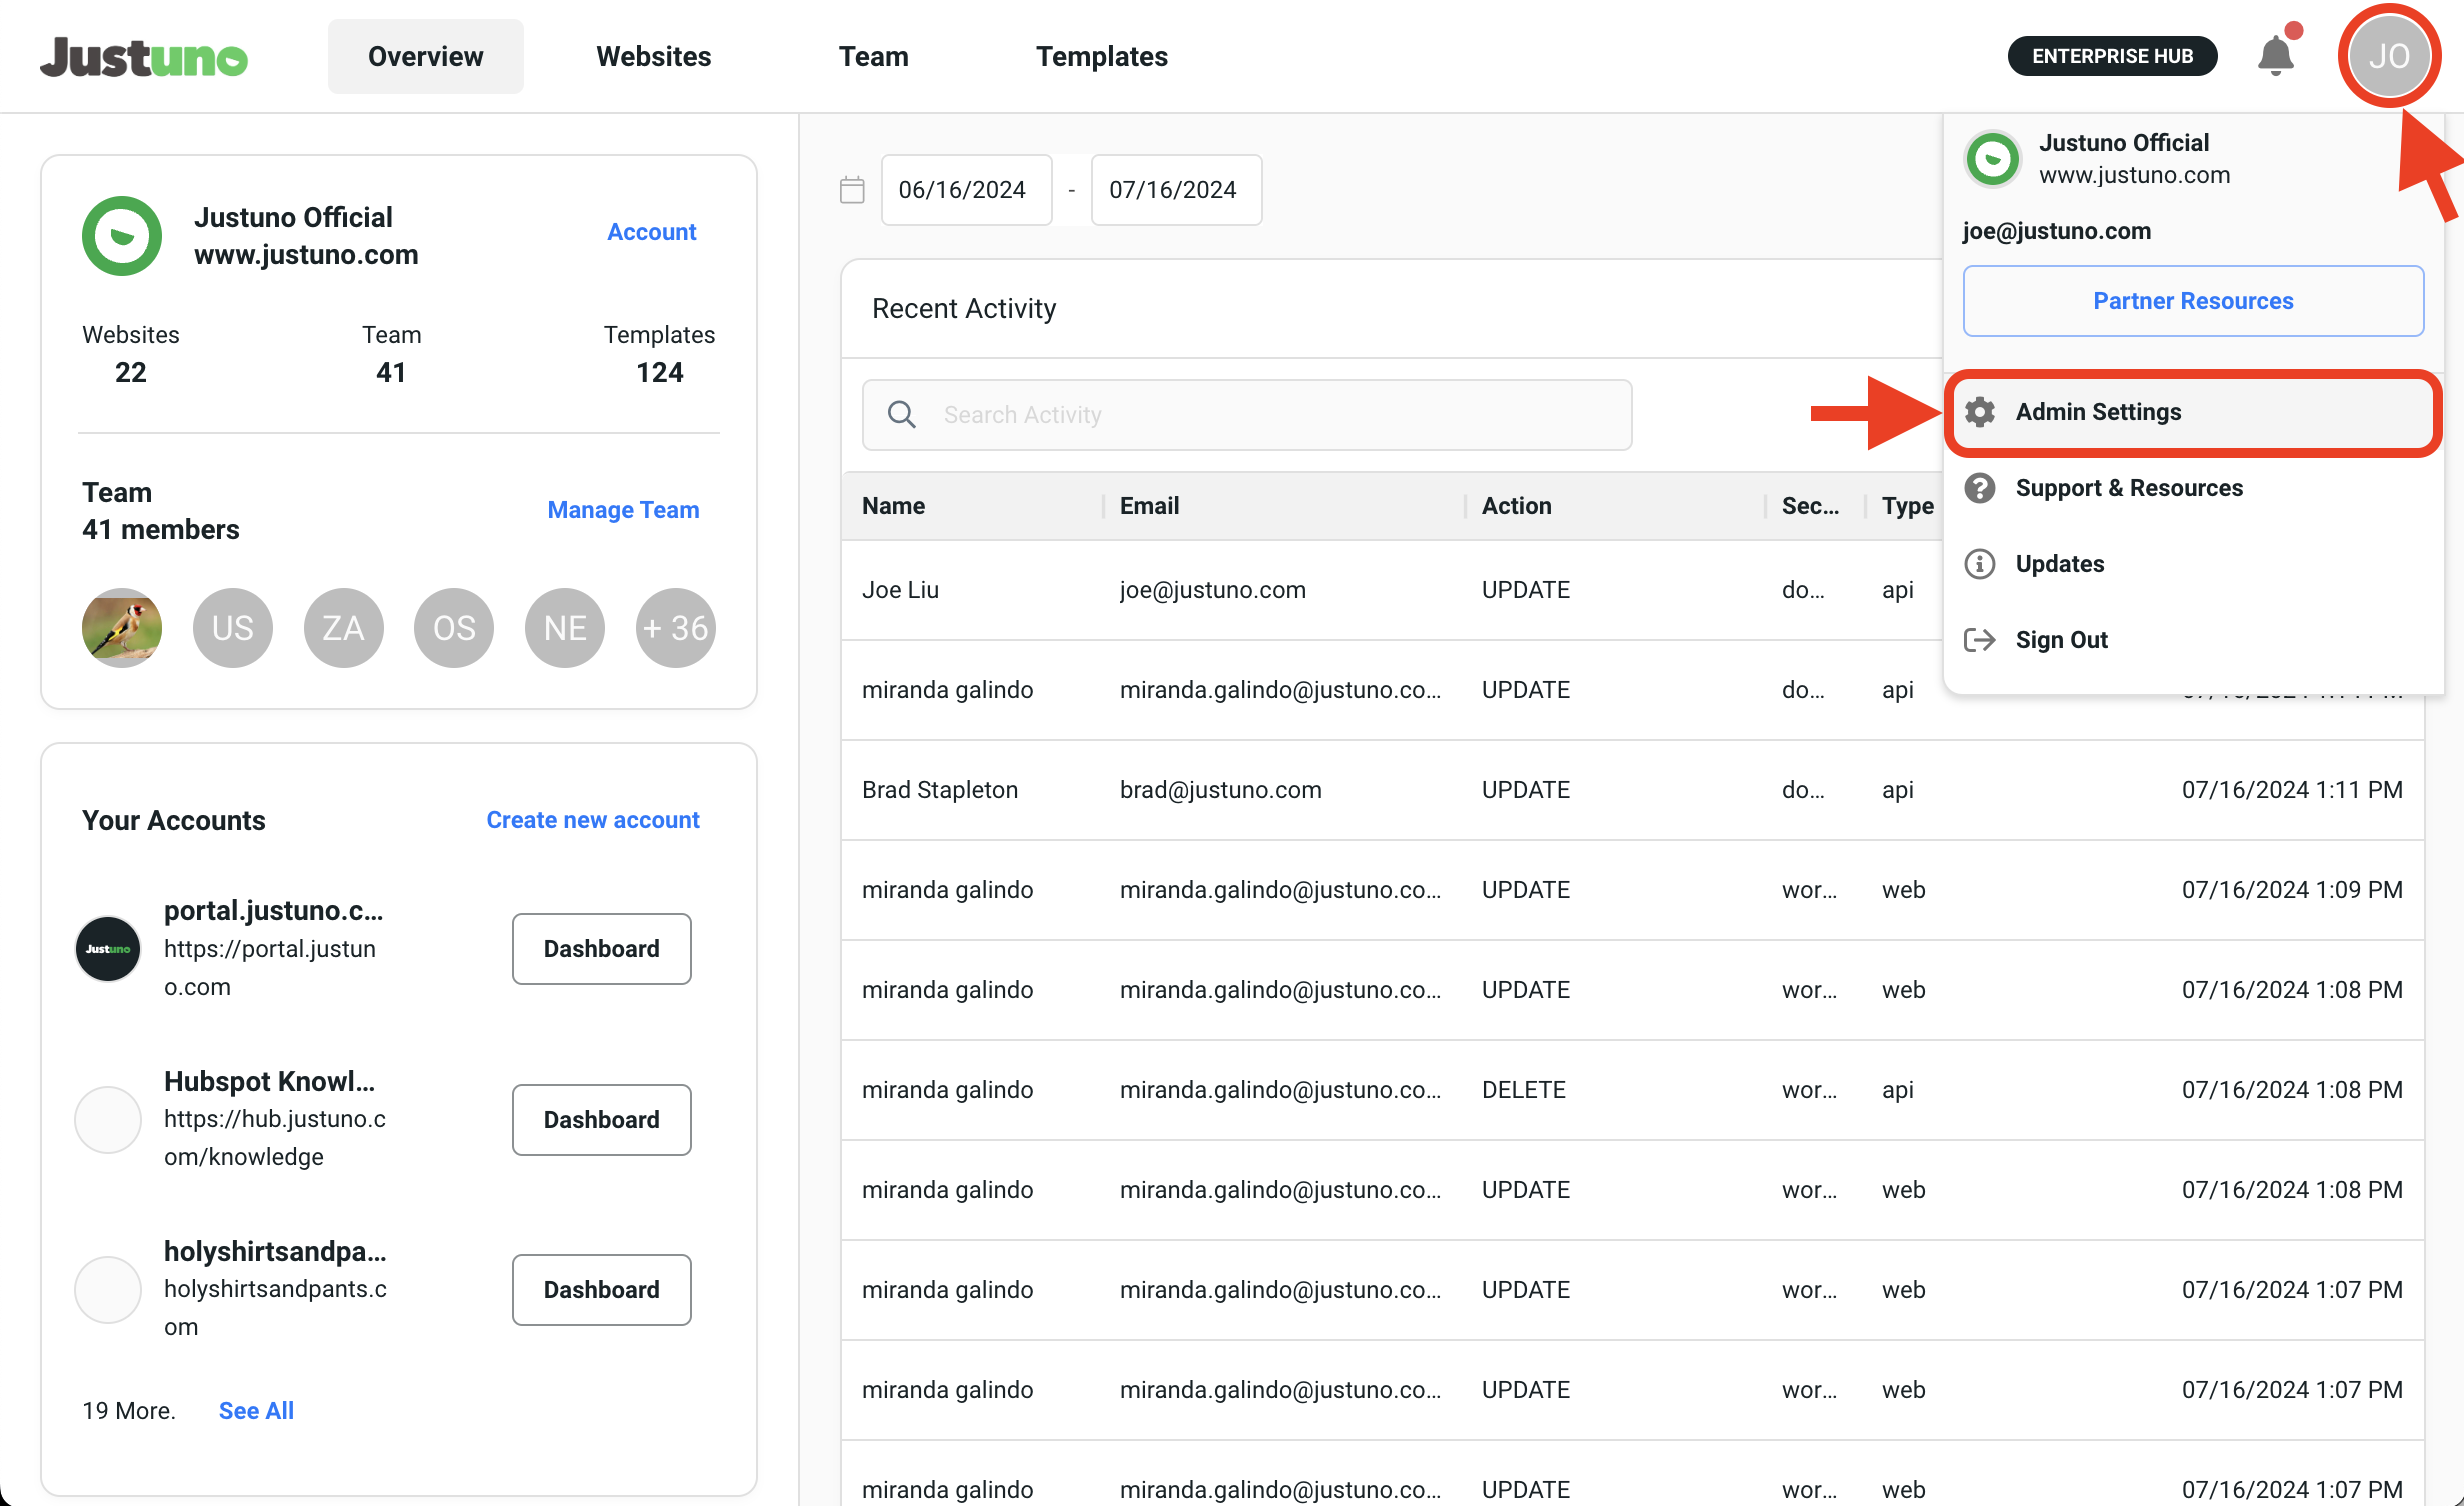
- Login to your Enterprise Hub - this requires admin-level access.
- Click on your avatar in the top right corner to access the Admin Settings.
- Within the Admin Settings, navigate over to the left menu and click on Partner Page.
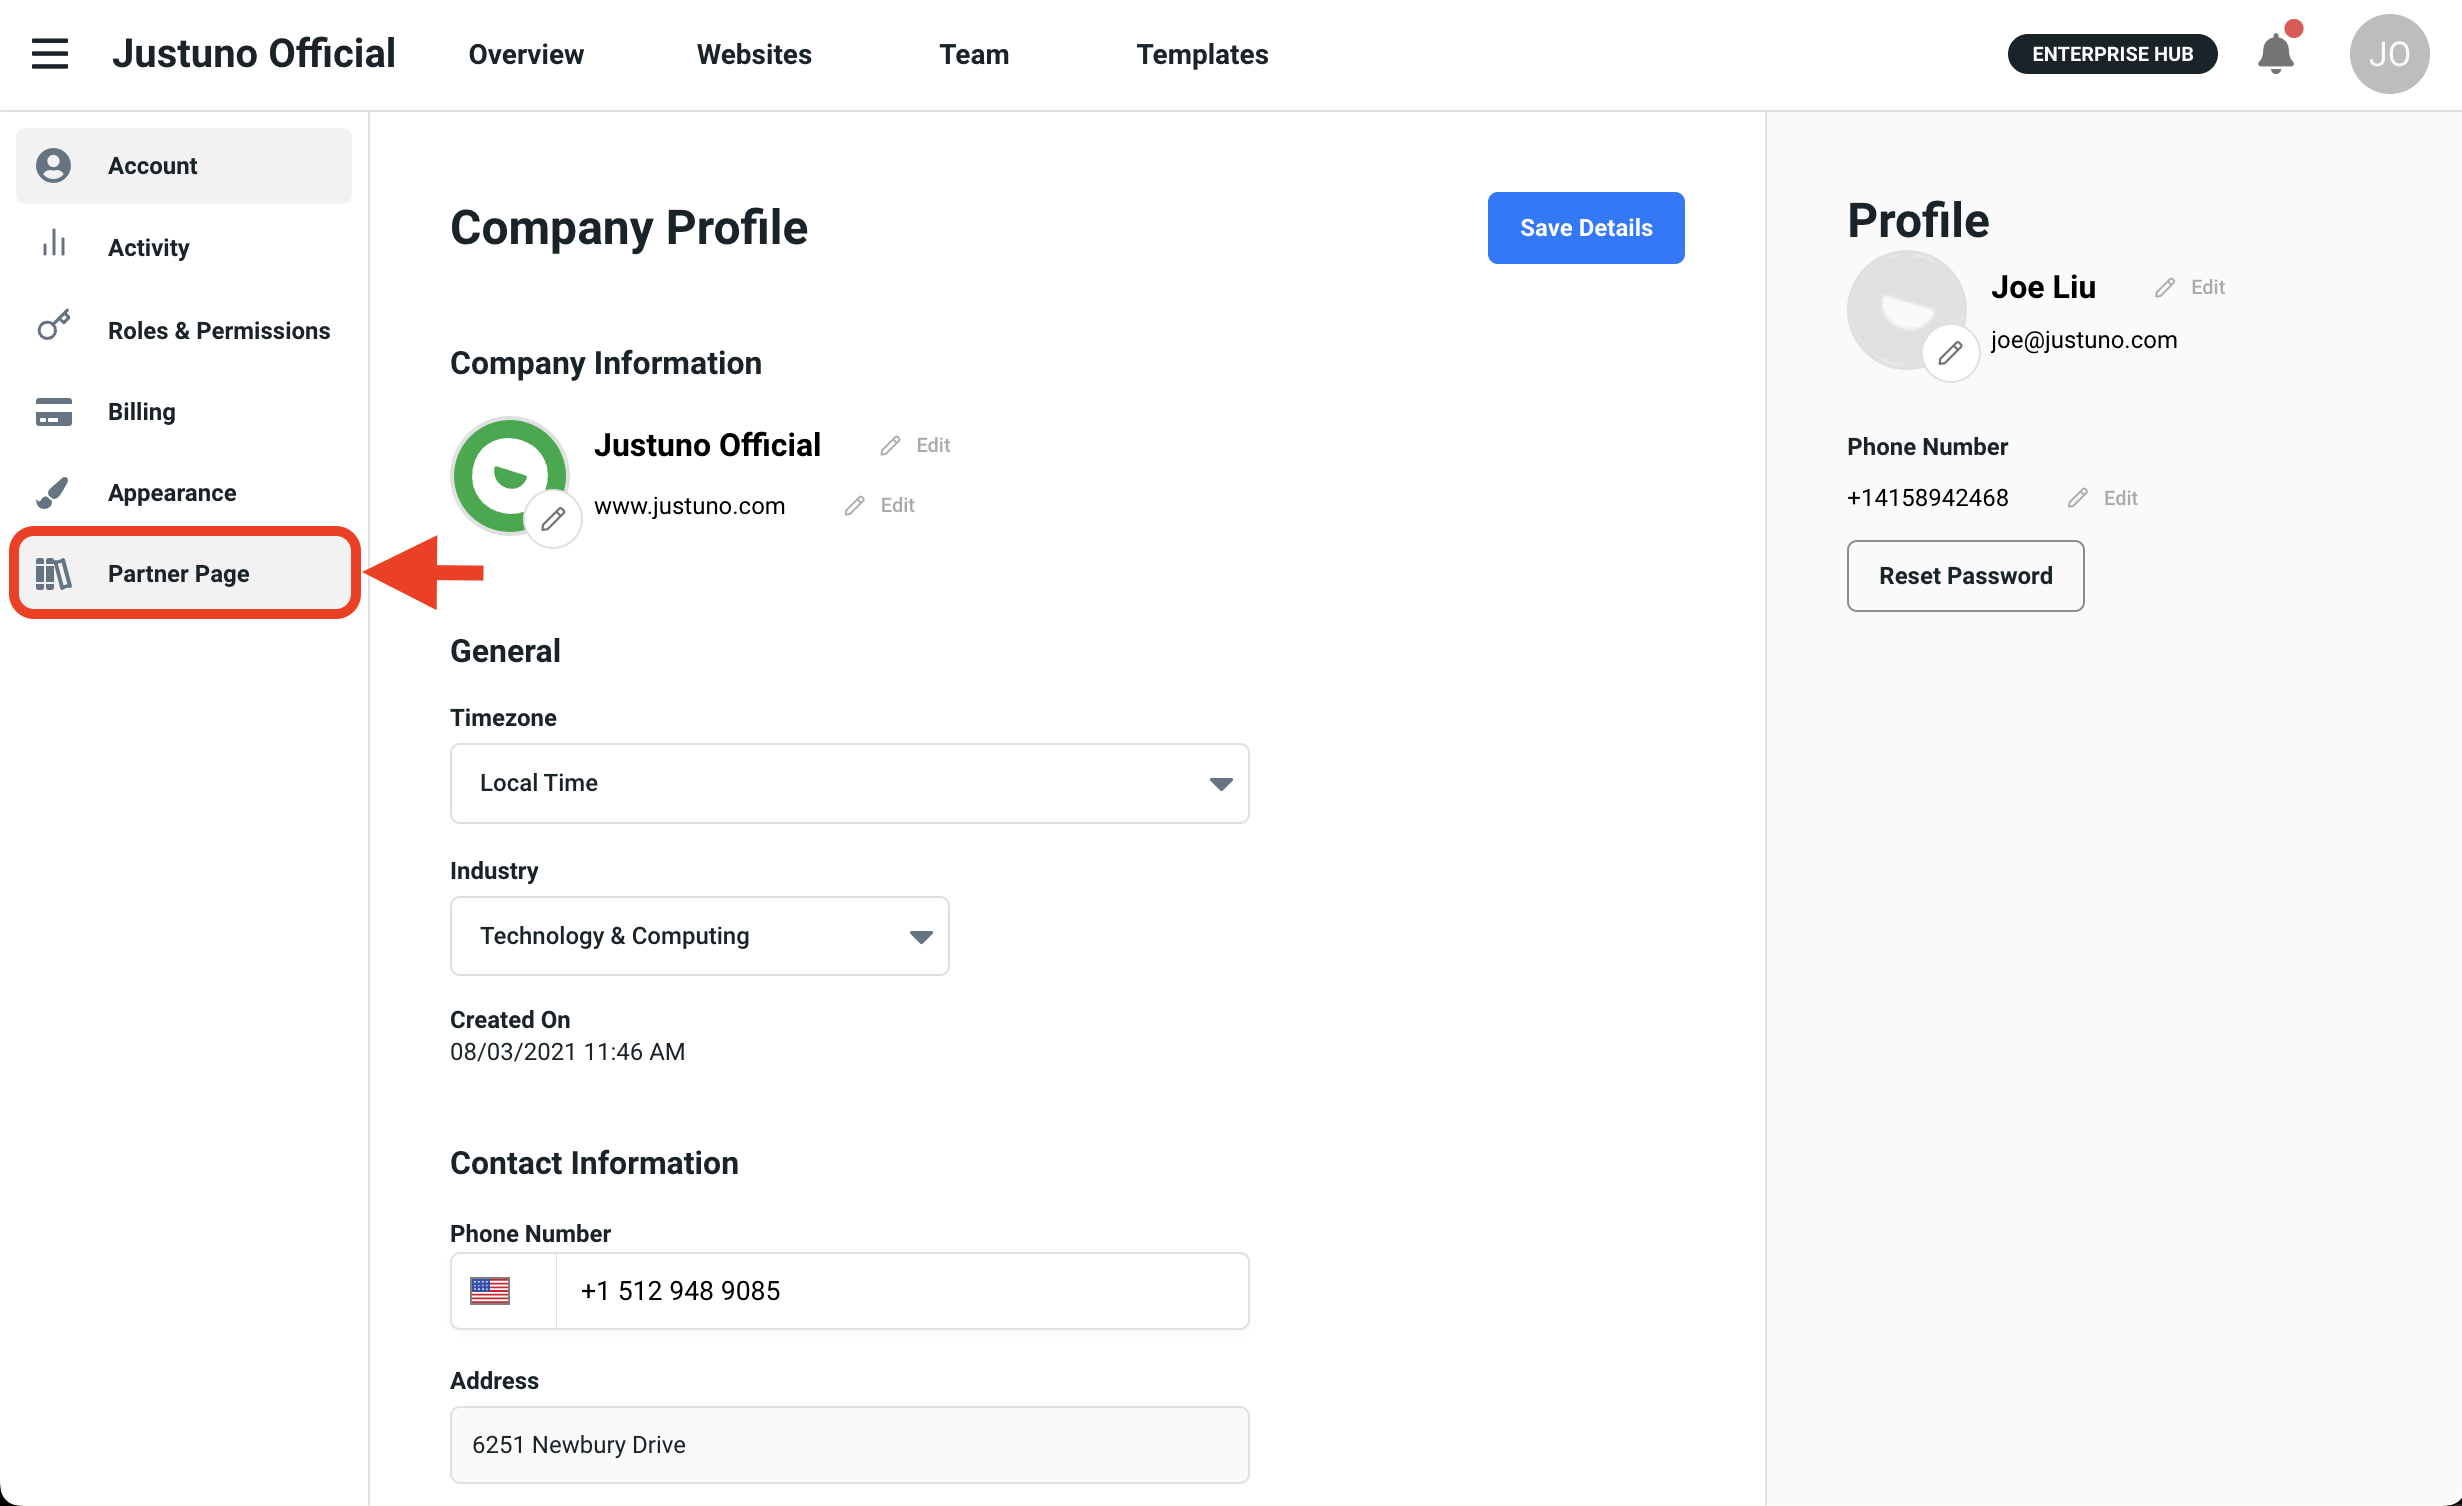
- Here you can indicate your industry, list your products/services, name, bio, contact info, and upload a company logo/banner.
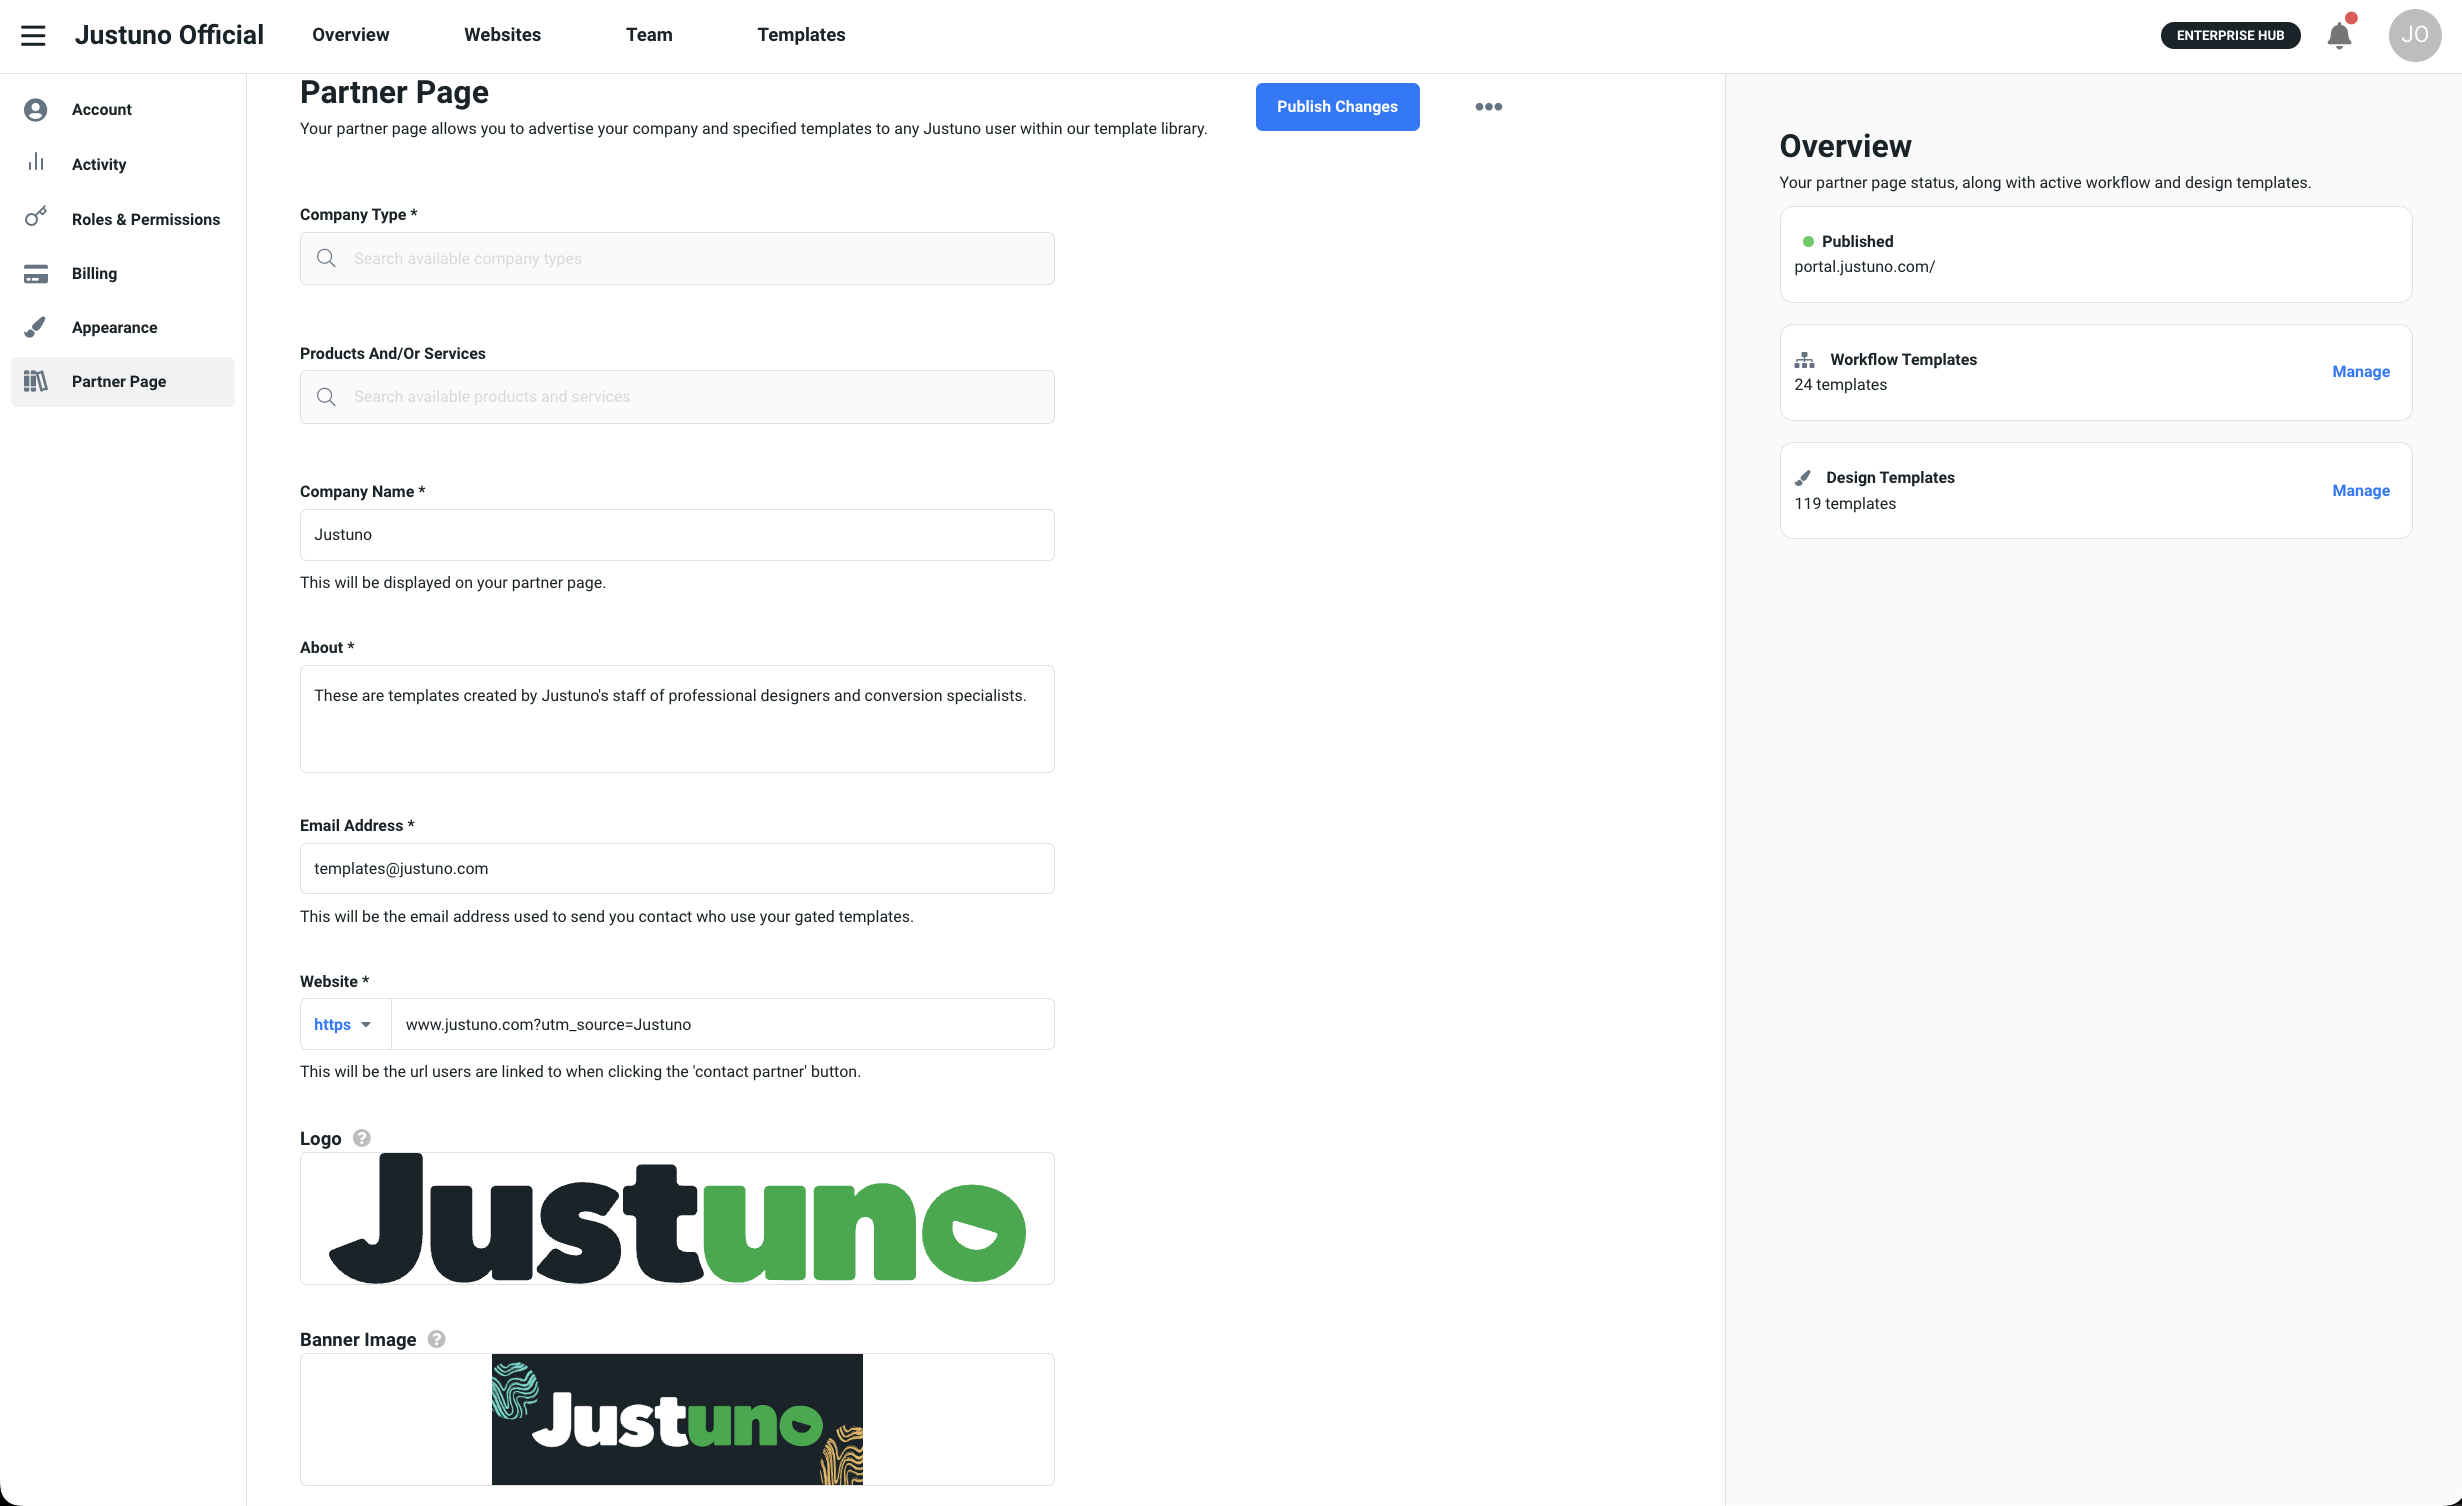
- Once you've input all the required fields, Publish Changes and your Partner Page is live!
Partner Templates
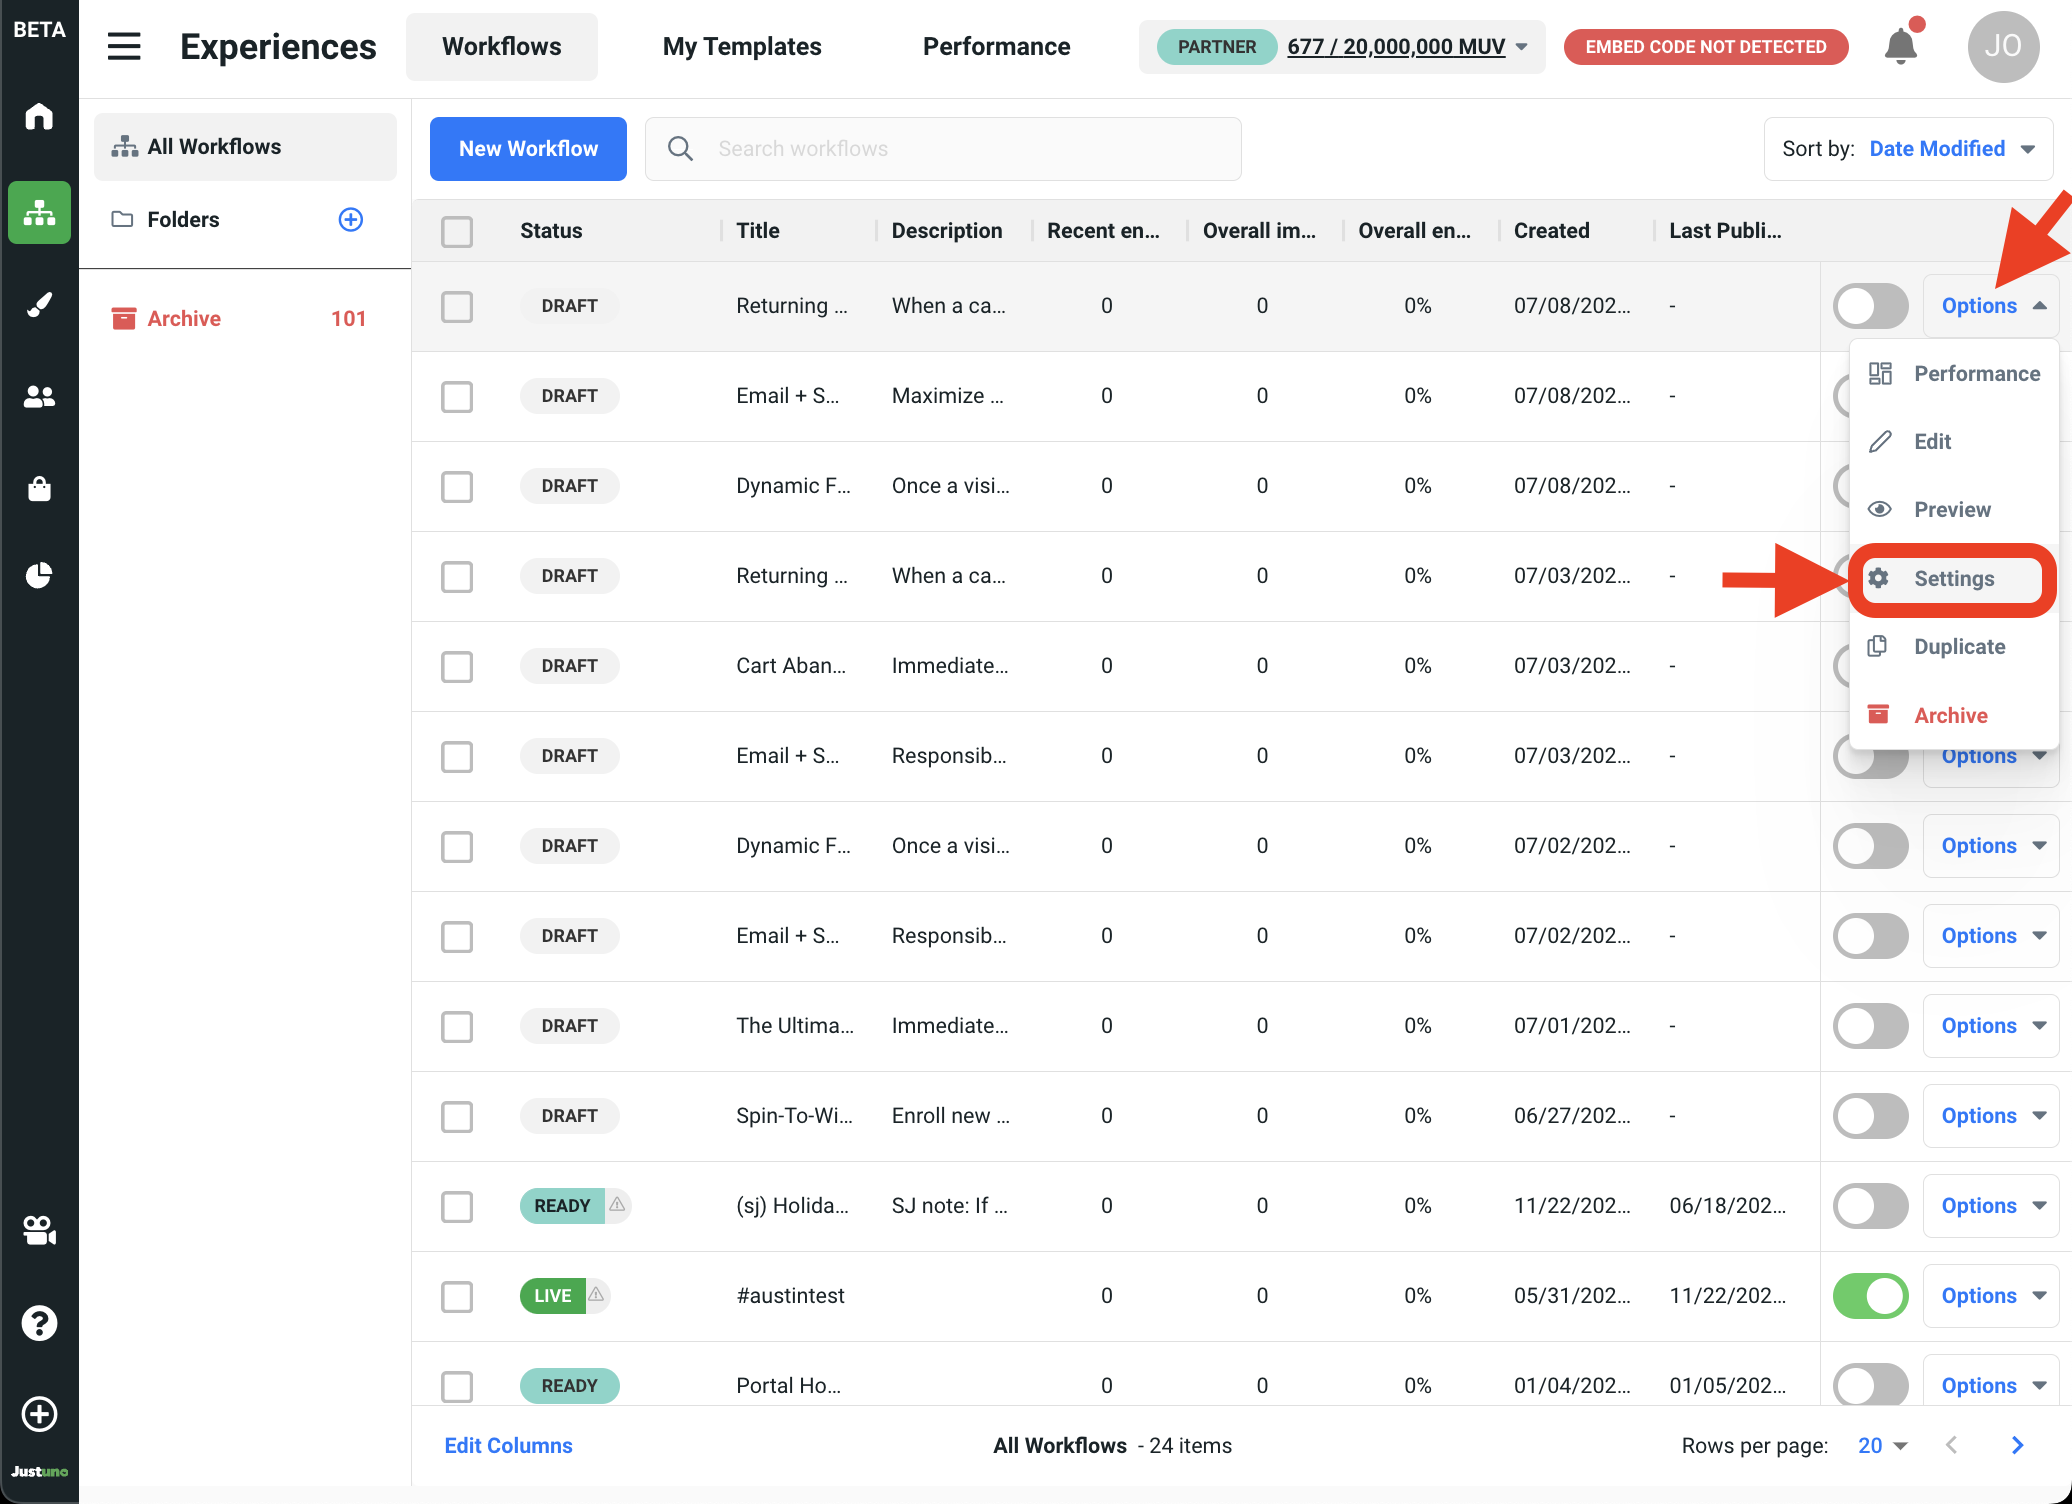
- To convert a workflow/design into a Partner Template, start by heading over to your workflow/design dashboard within your merchant account. Click on the Options button to the right of the desired workflow/design and select Settings in the drop-down menu.
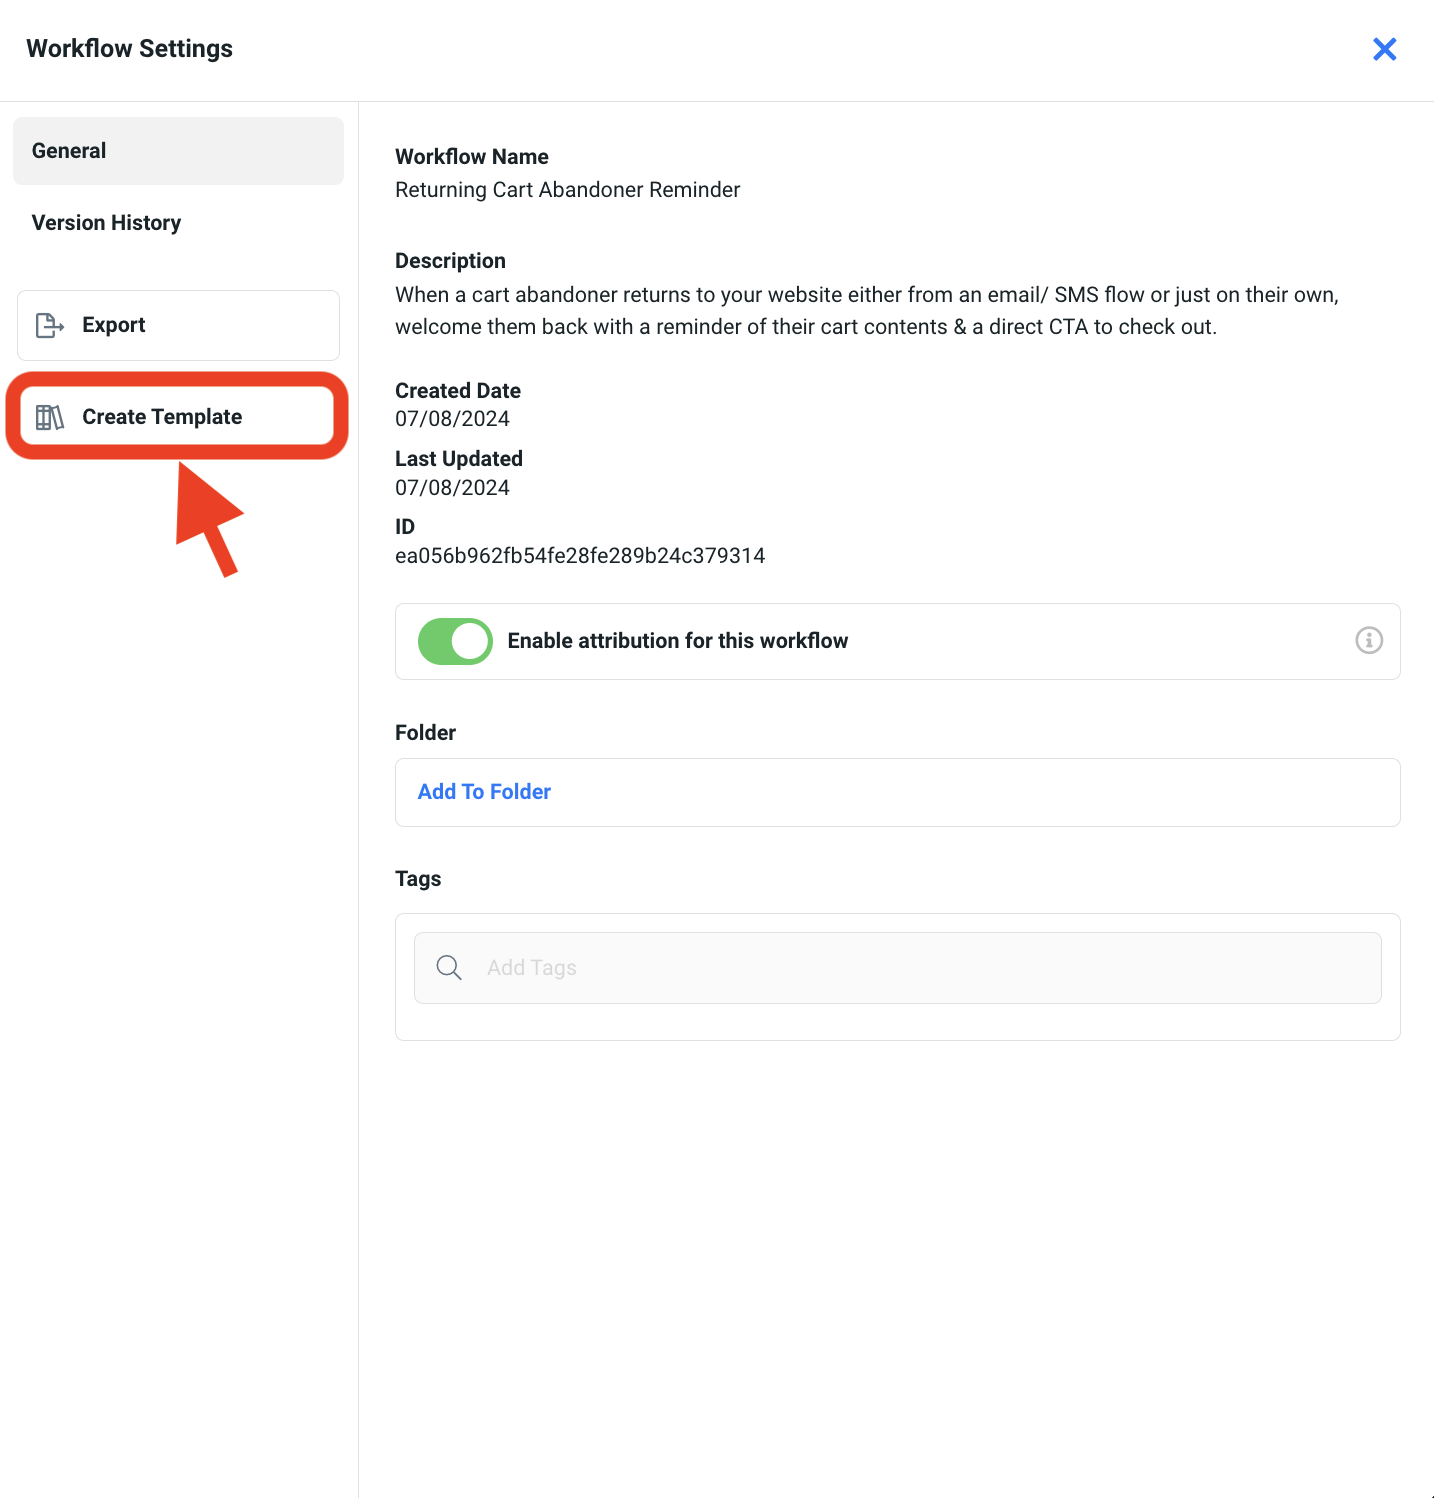
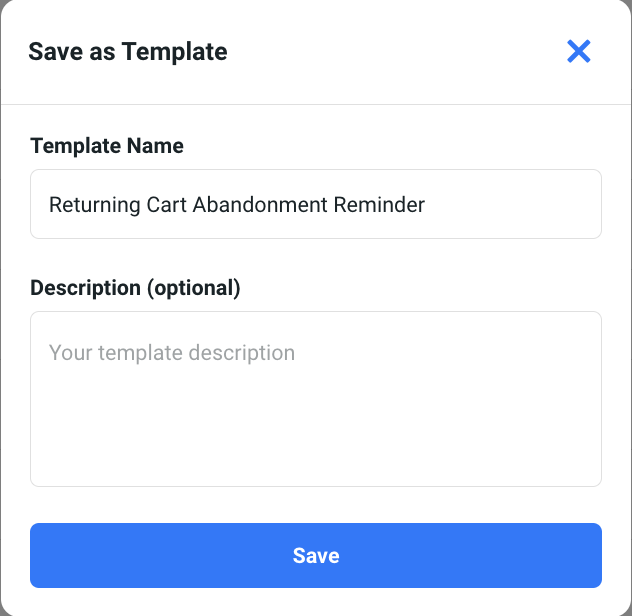
- In the Settings panel, click on Create Template. Input your desired template name & description. Then hit Save.
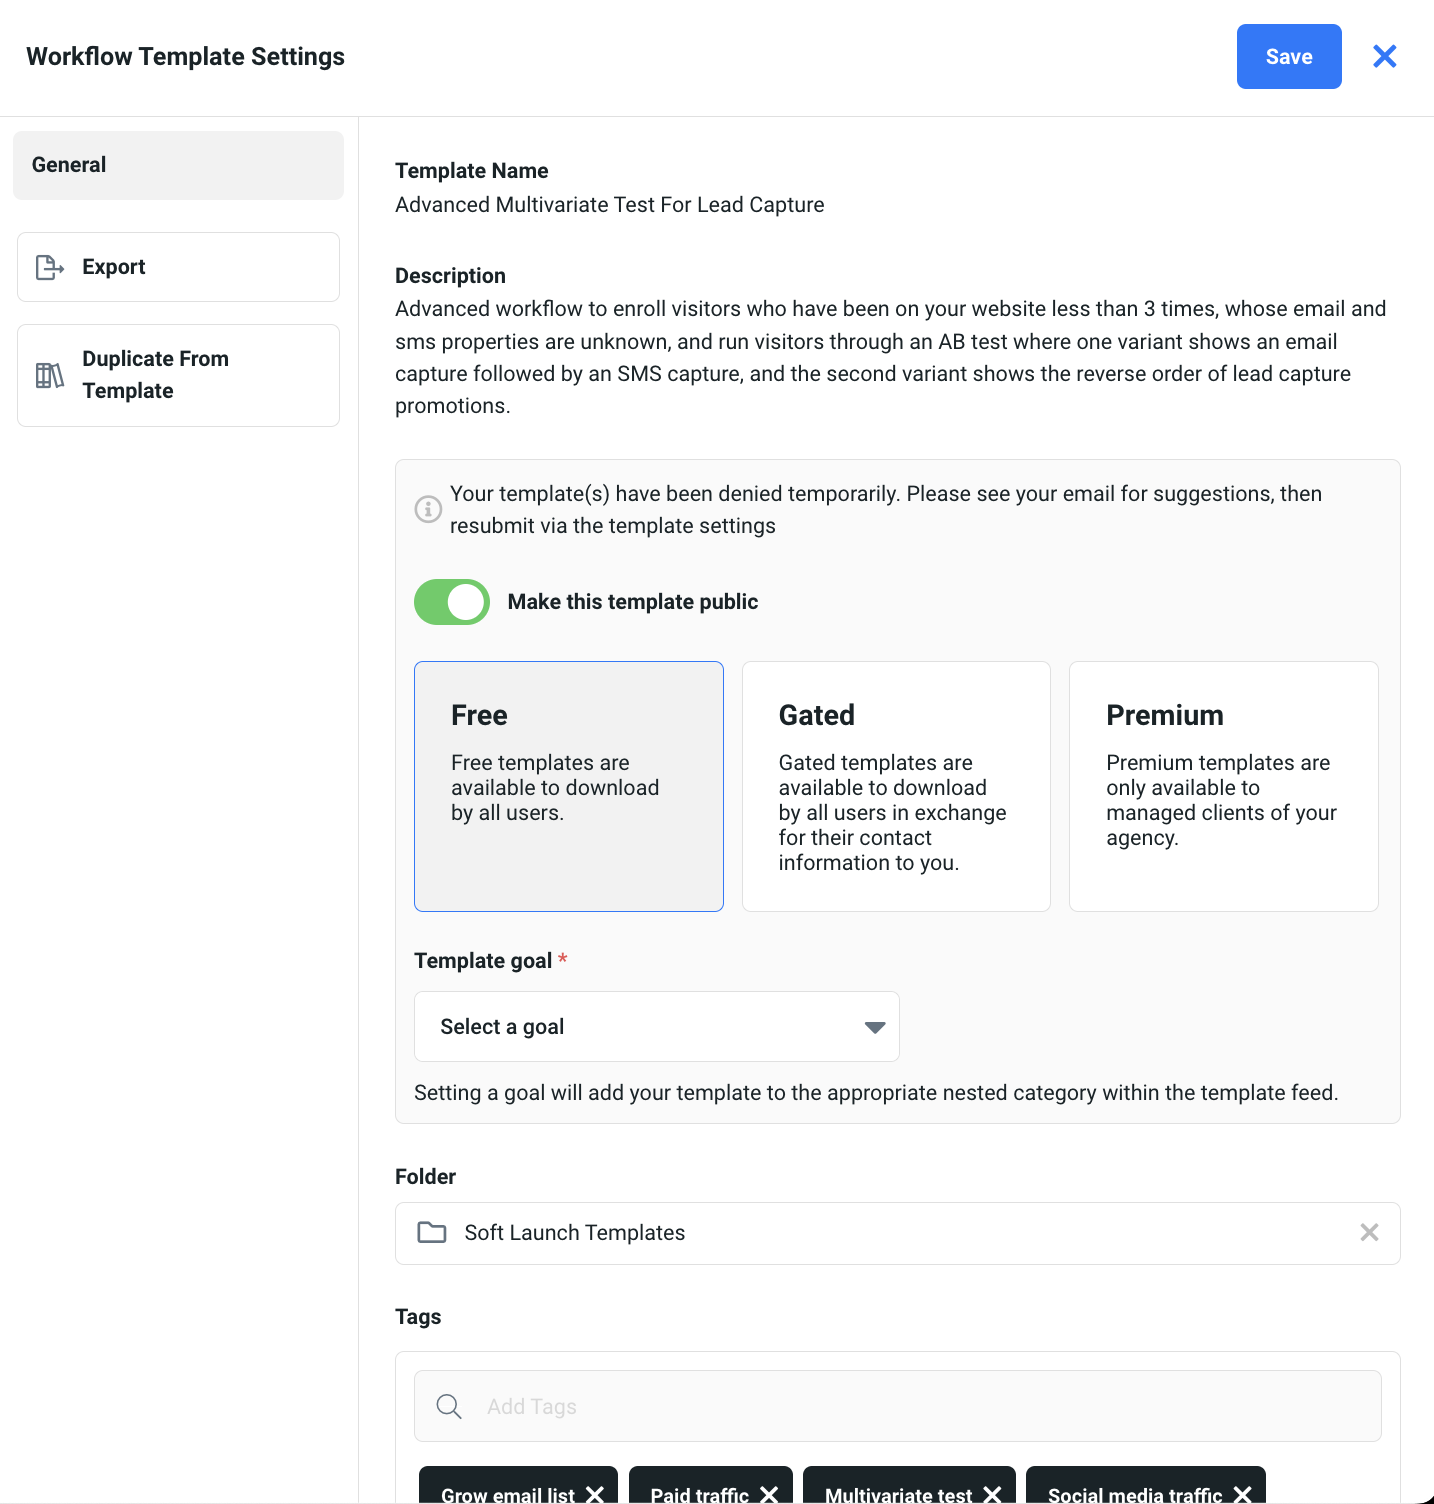
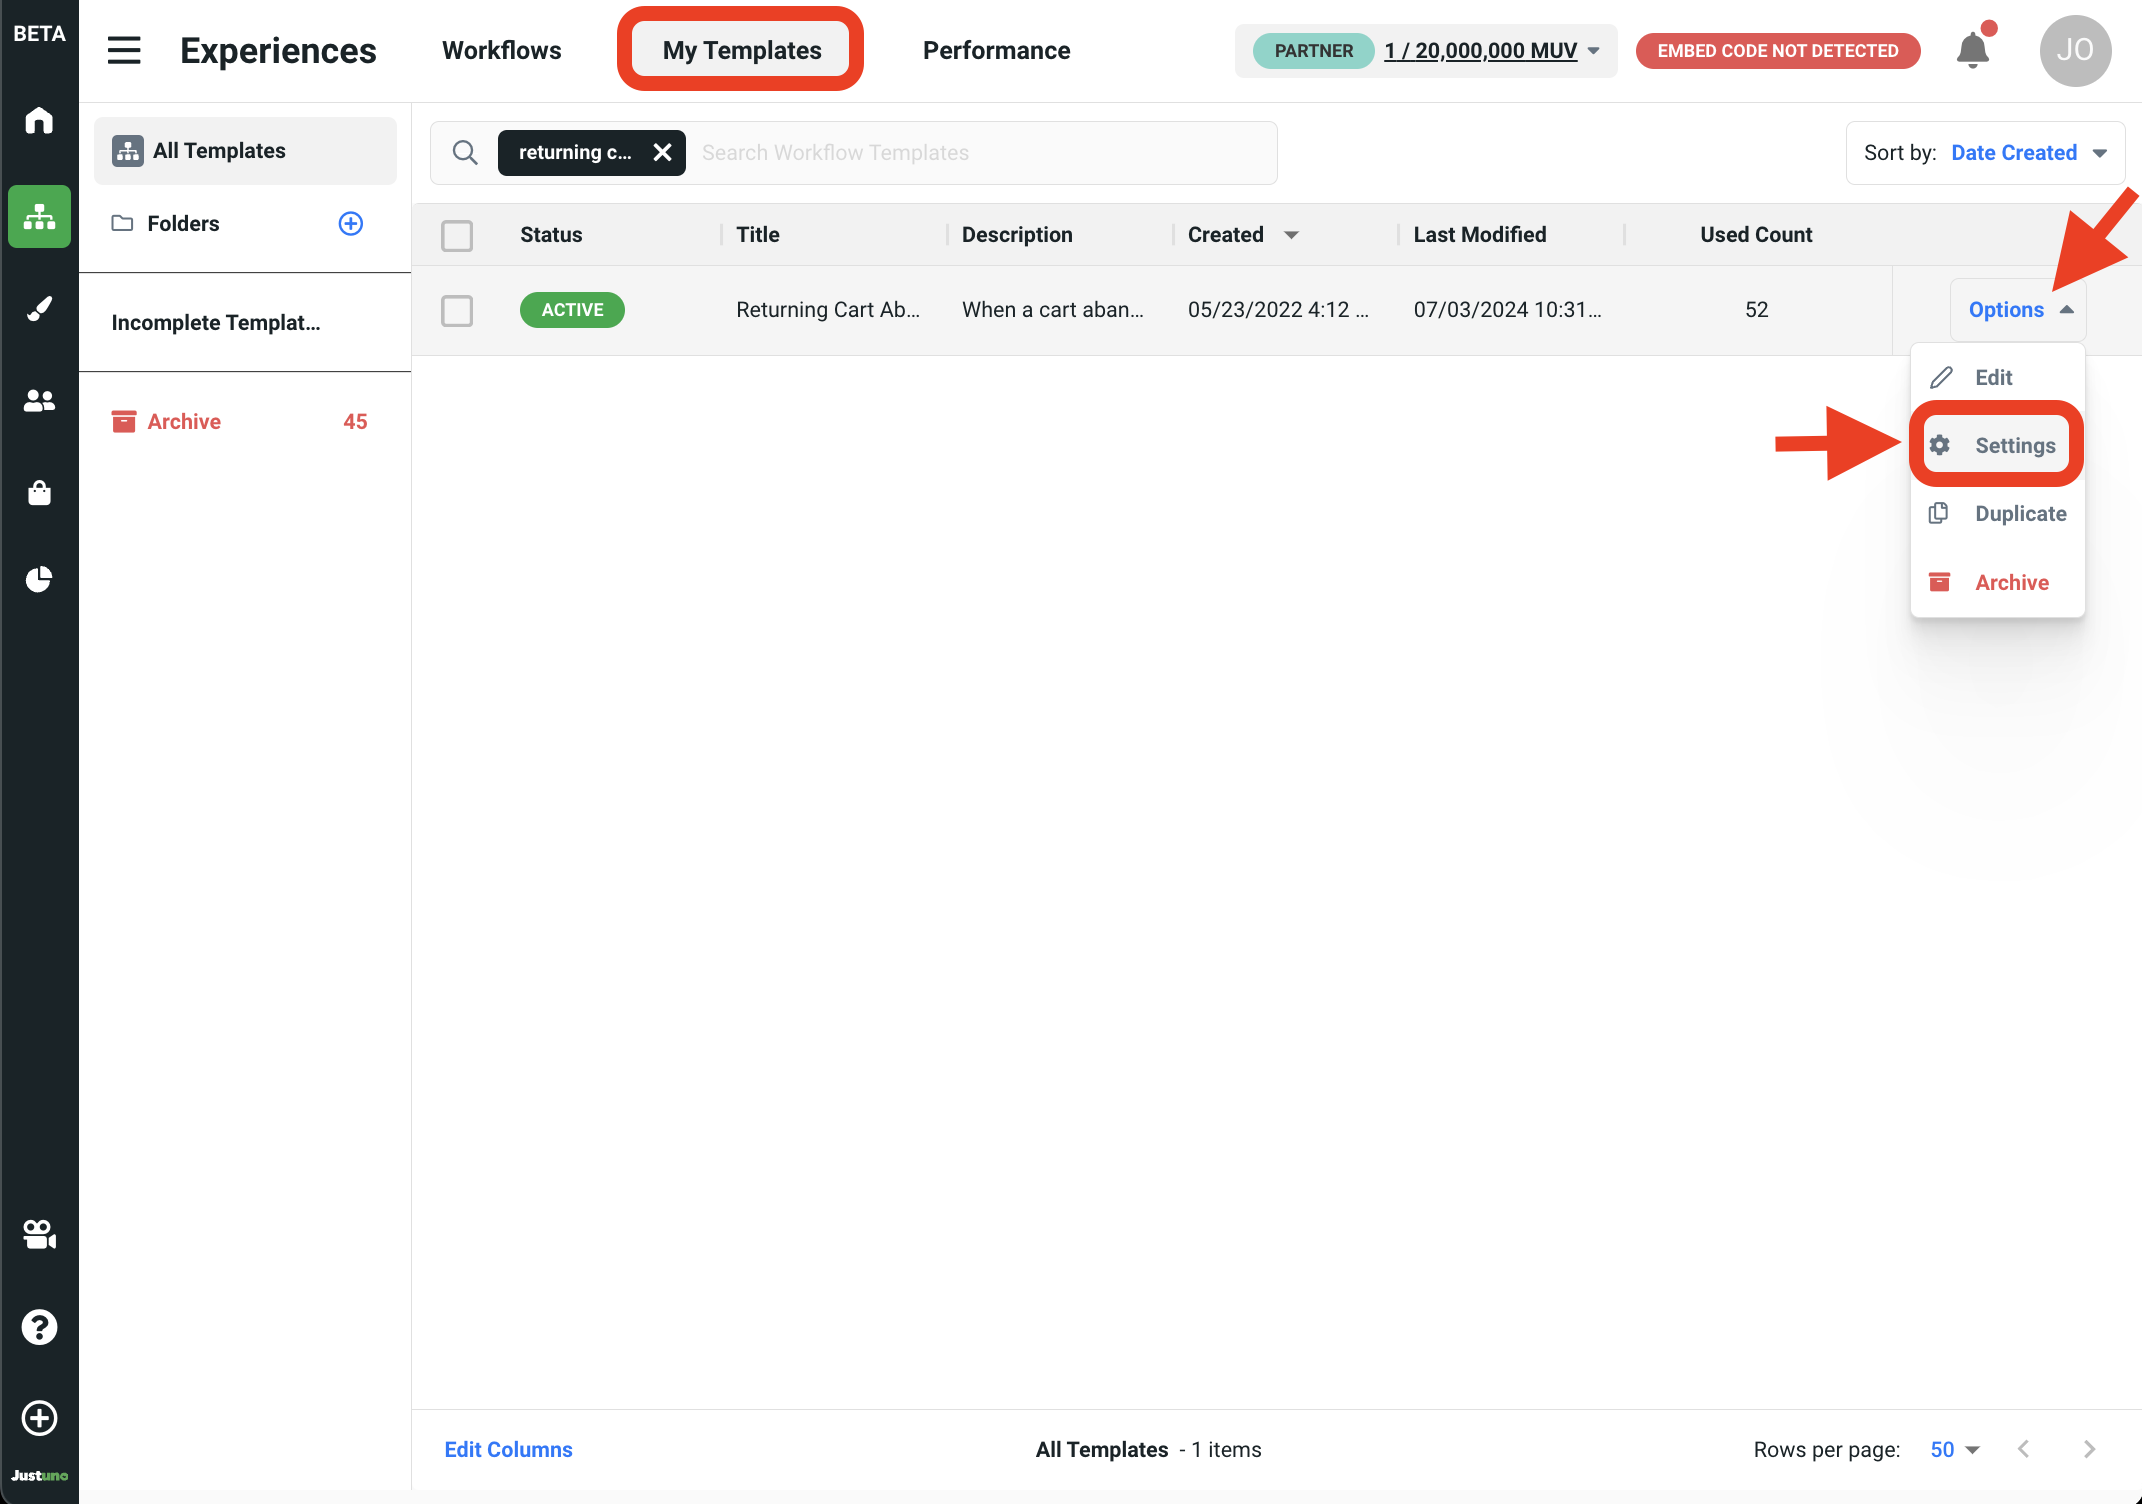
- The new template should now be visible in your Templates tab. The last and final step is to make this template public. Inside the template area, click on the Options button and select Settings.
- In this Settings panel, you'll find a toggle labeled Make this template public. Switching on the toggle will let you indicate whether this public template will be made available Free, Gated, or Premium. Select a goal, folder and add tags (all optional). Double-check that everything is correct and hit Save.
NOTE: All public templates are subject to approval by Justuno before going live. Our team gets notified when you submit them but if you're looking for even faster publication just email/Slack our team.