Multivariate Testing
In this support article we will cover how to configure a multivariate test within Justuno.
At a glance:
Last updated: 07/22/2024
Introduction
Multivariate testing, also known as A/B testing is a feature in Justuno that allows users to conduct split testing amongst their website audience. You'll have complete control over what percent of visitors go down each path in your workflow all whilst gathering valuable metrics on what works and what doesn't.
Accessing Multivariate Testing
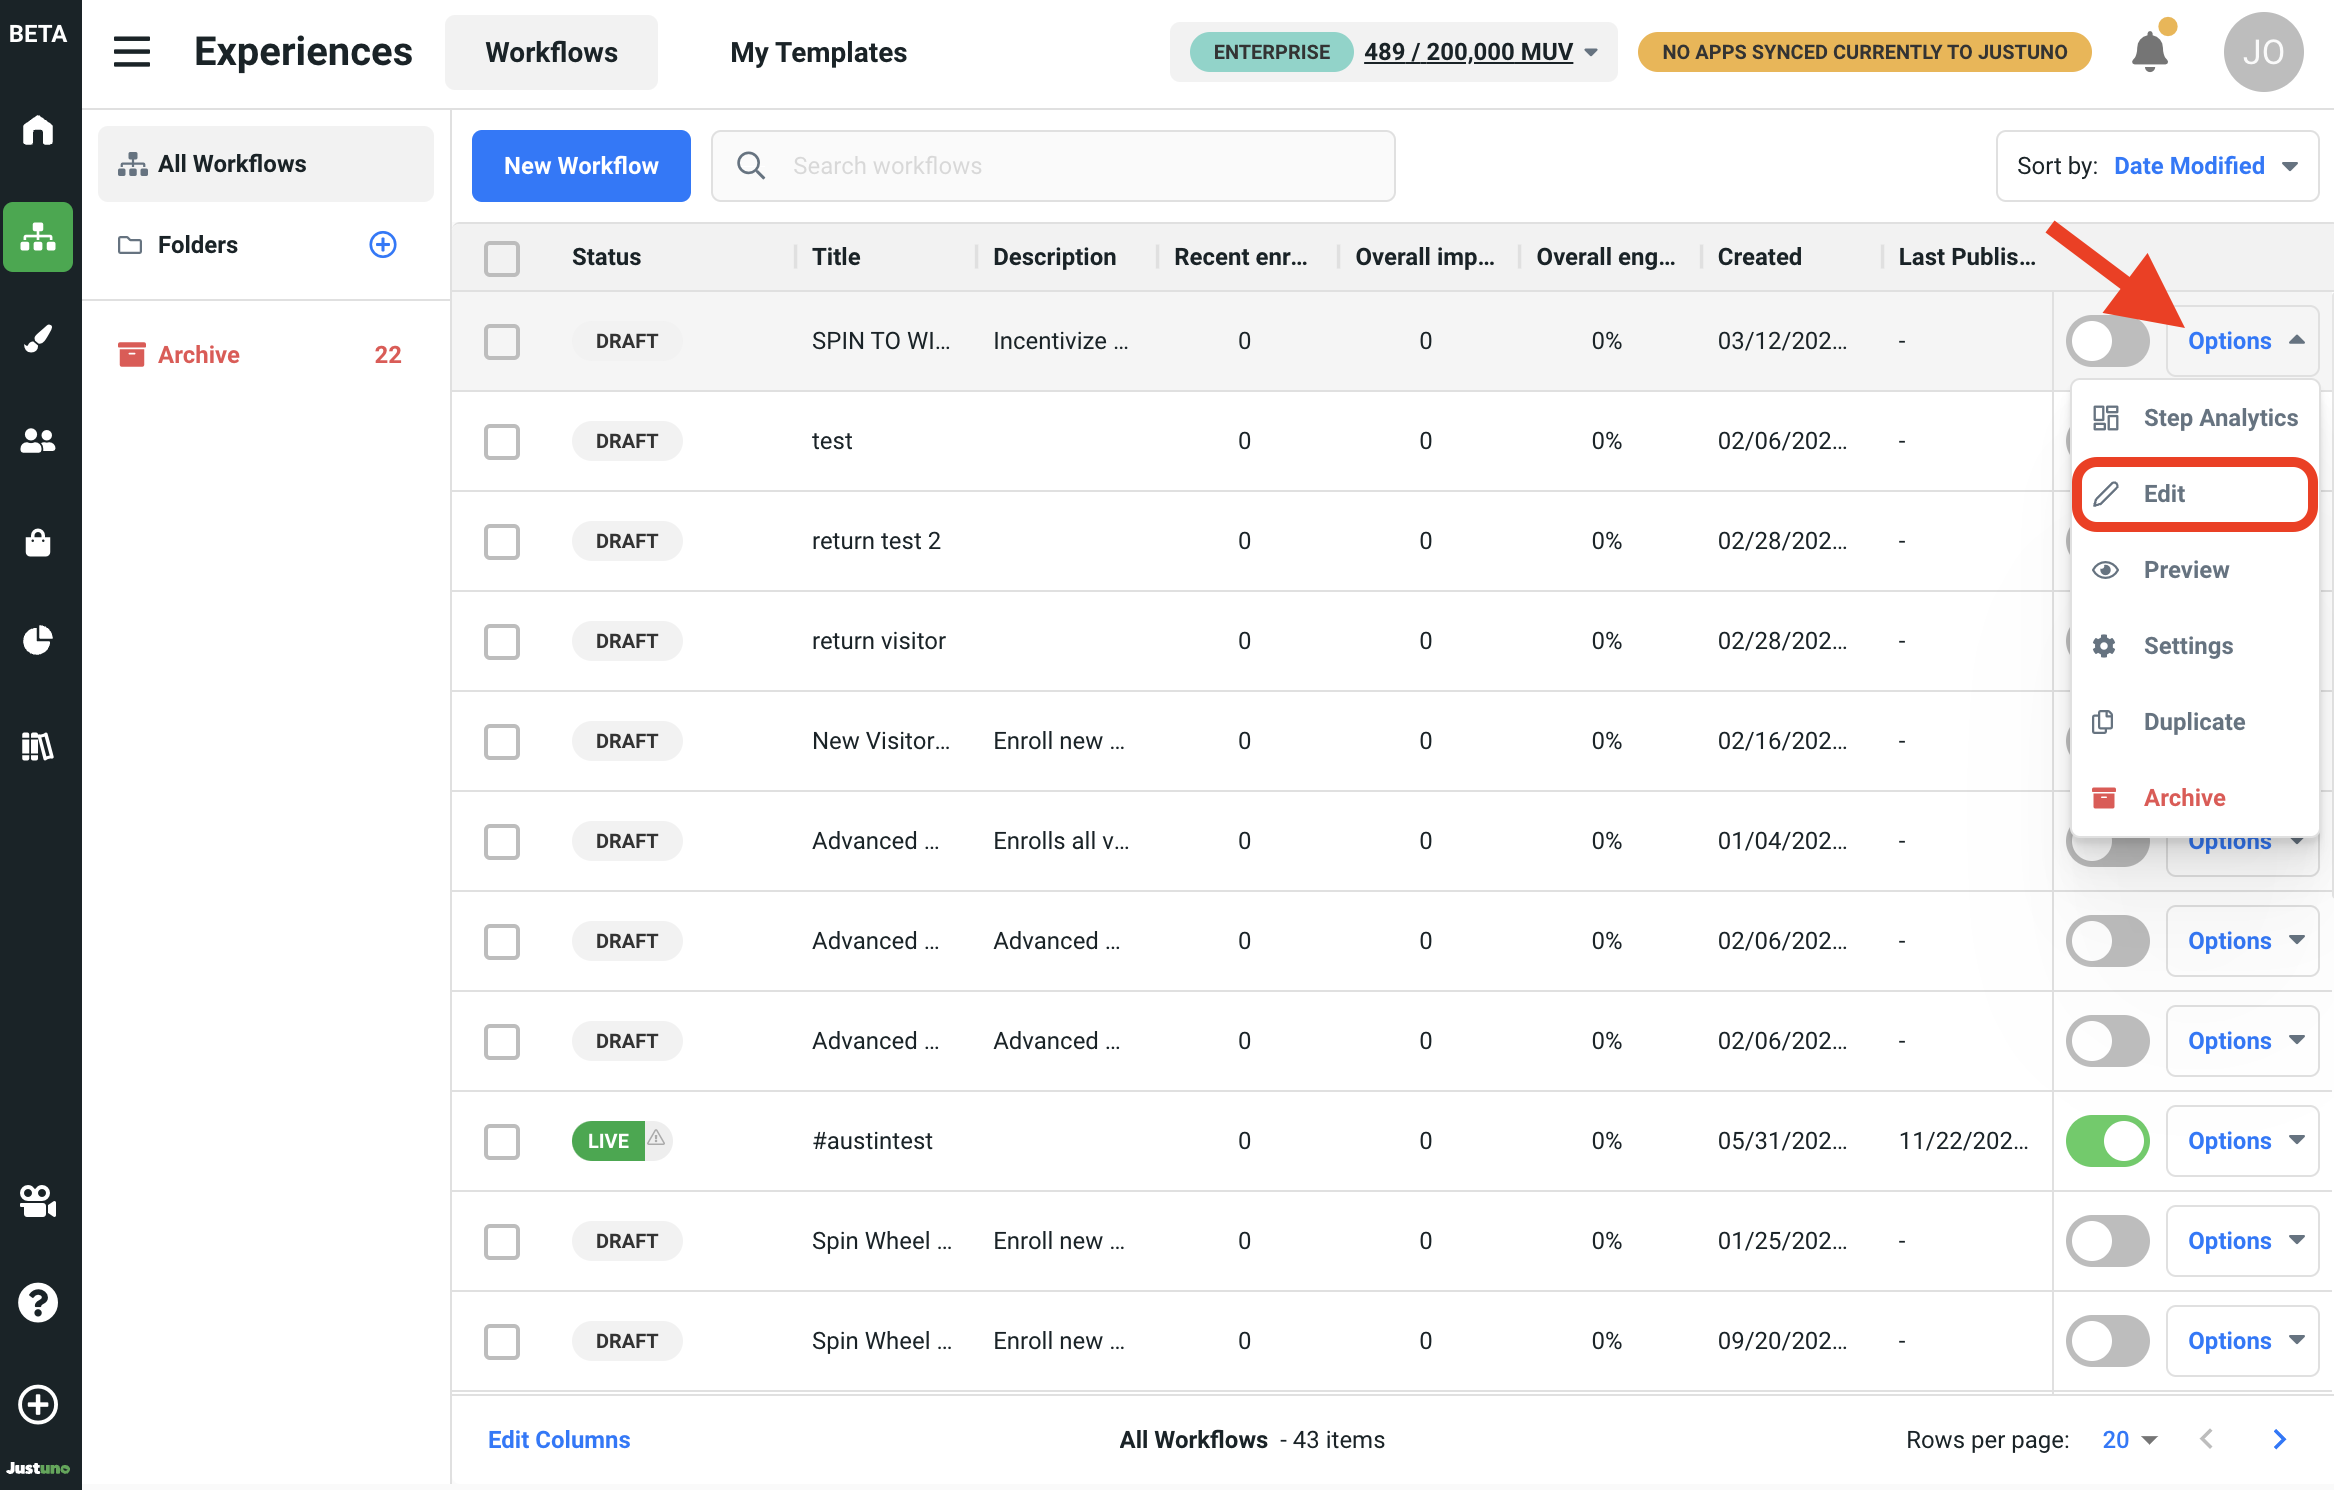
Before a multivariate test can be created you will first need to have a workflow in place. Workflows can be created and modified within the experiences tab in your dashboard. Once you've created a workflow, enter the respective workflow editor by clicking on Options > Edit.
A multivariate test is a workflow action, these can be found on the left menu inside the workflow editor. Find the "Multivariate Test" action and drag it into the active workflow.
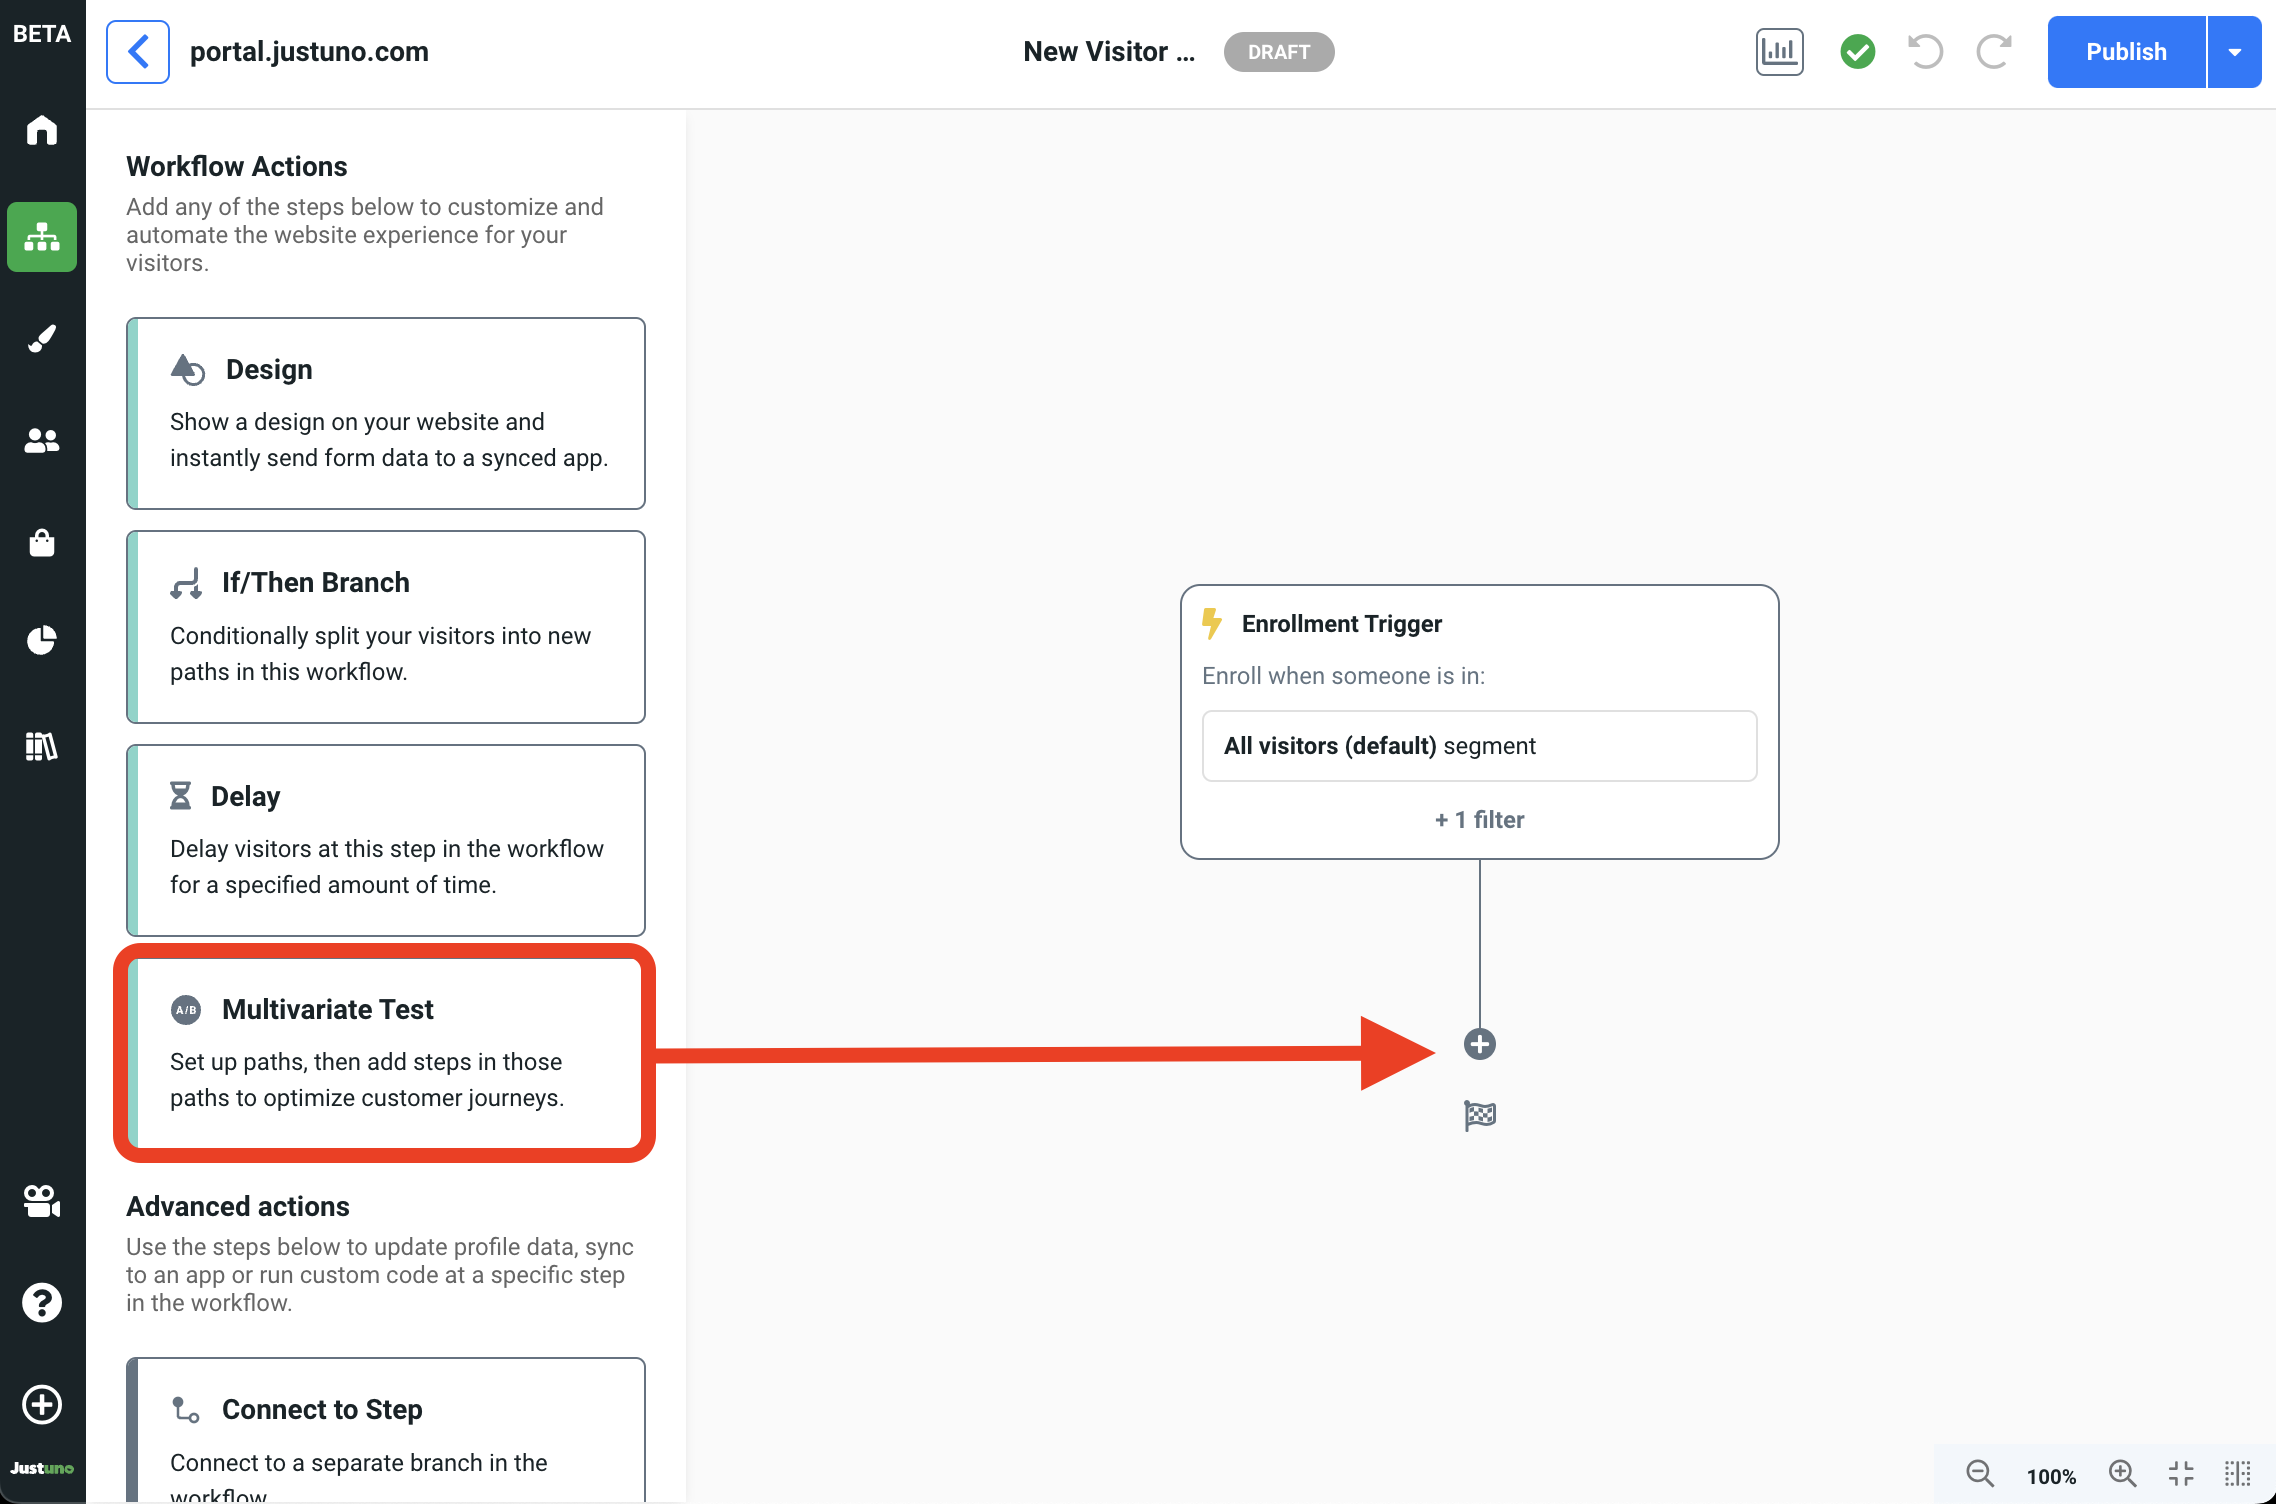
Tip: When placing a multivariate test within your workflow, you will want to place it below all your general targeting conditions. Ideally just before you show a design.
Once the multivariate test is added, a configuration panel will appear from the right allowing you to set various inputs.
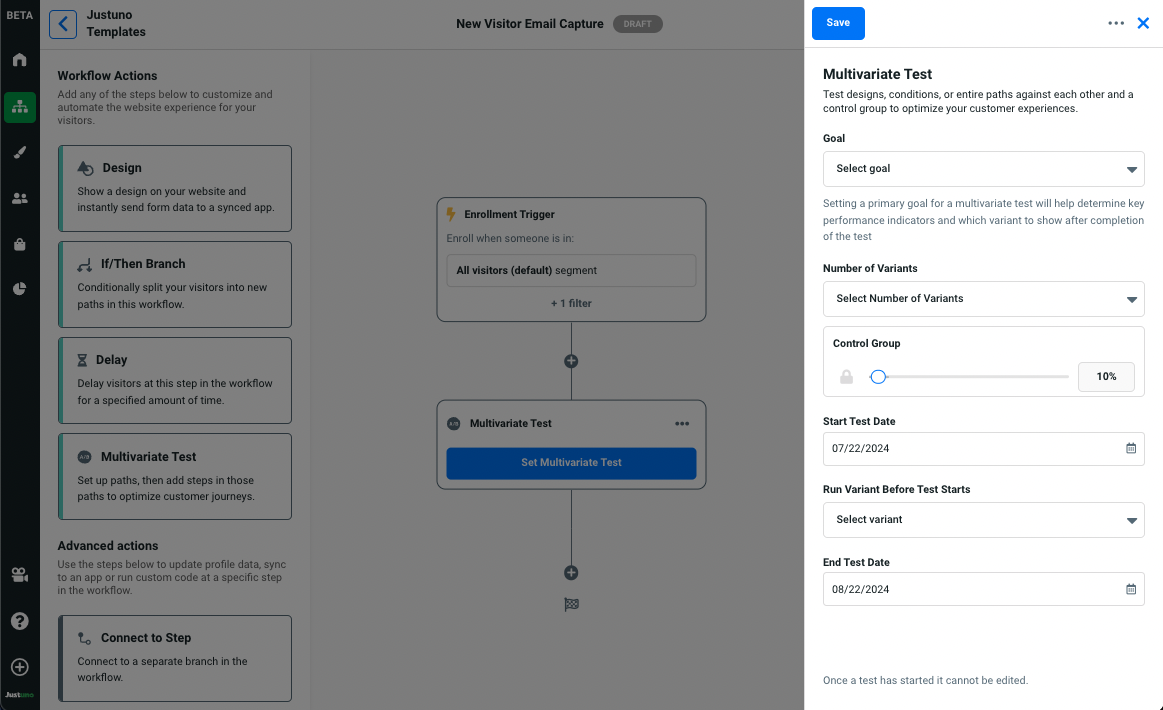
Here you will find the following options:
- Goal: This will let our system know what analytics will be displayed based on what you are trying to achieve.
- Number of Variants: This will allow you to configure the multivariate test using up to 10 variants. You may also toggle the lock icon to lock/unlock variant frequencies.
Note: You will also find a default input for Control Group. The control group is an additional variant used to show your target audience nothing at all.
- Start Test Date: This determines the day in which the multivariate test will begin.
- Run Variant Before Test Starts: The variant selected here will be the default variant. Leading up to and following the testing period, this variant will be the only one displayed to ensure a design is always visible.
- End Test Date: This determines when the Multivariate test will stop.
These settings cannot be changed once a test has begun, so be sure each setting is correct before moving on to the next step.
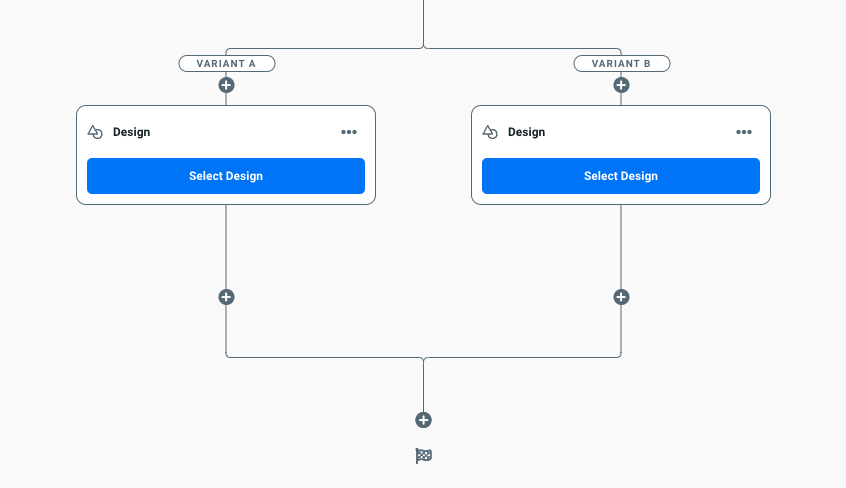
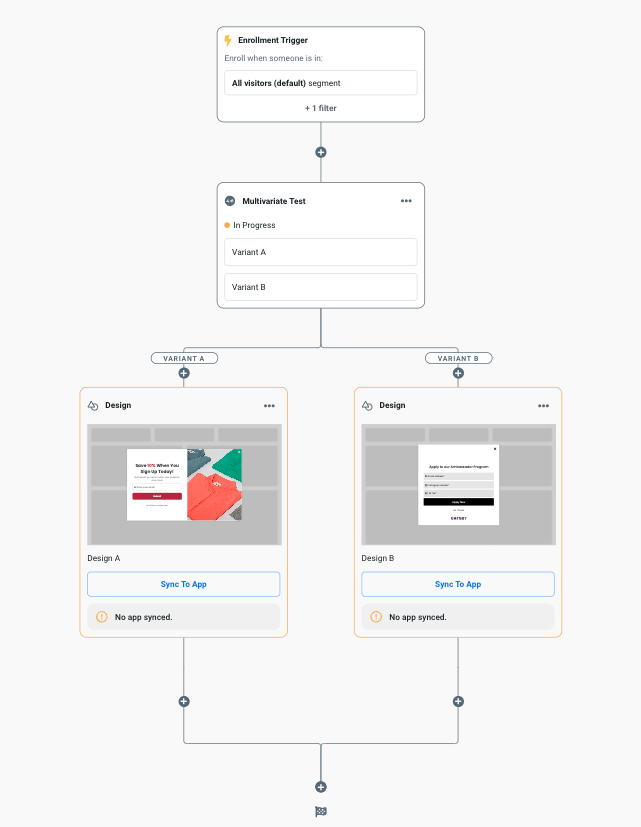
Once the test is configured, hit Save. Your variant branches should now populate, allowing us to add multiple designs. This is done by dragging the Design workflow action into each of your variant branches: A, B, C etc. depending on the number of variants you have set.
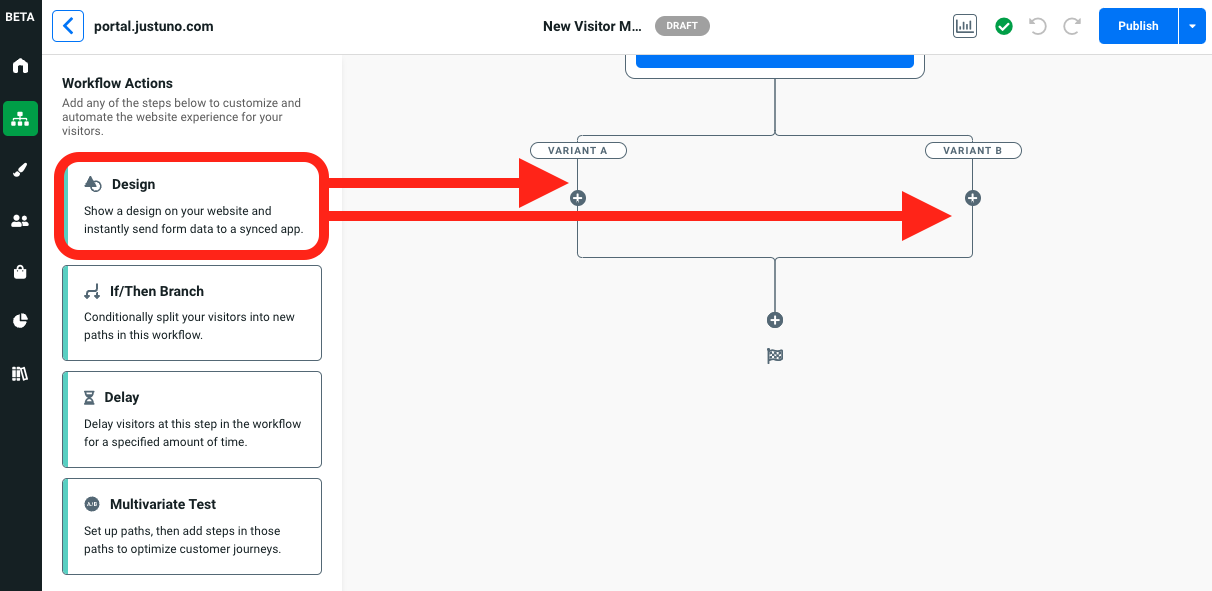
Use the “Select Design” option to choose the designs that will display for each variant.