Embed Designs into Web Pages
This Justuno article will cover how to embed your workflow designs into any spot of a web page for an in-page experience rather than an overlay
At a glance:
Introduction
With Justuno's powerful workflows and designs, you not only have the ability show a design when you want to, but you can also embed the design into any existing element on your web page in real-time. Combined with enrollment triggers, you can present and even A/B test highly personalized in-page promotions and messaging to your website visitors in key spots of each page.
Design Studio Settings
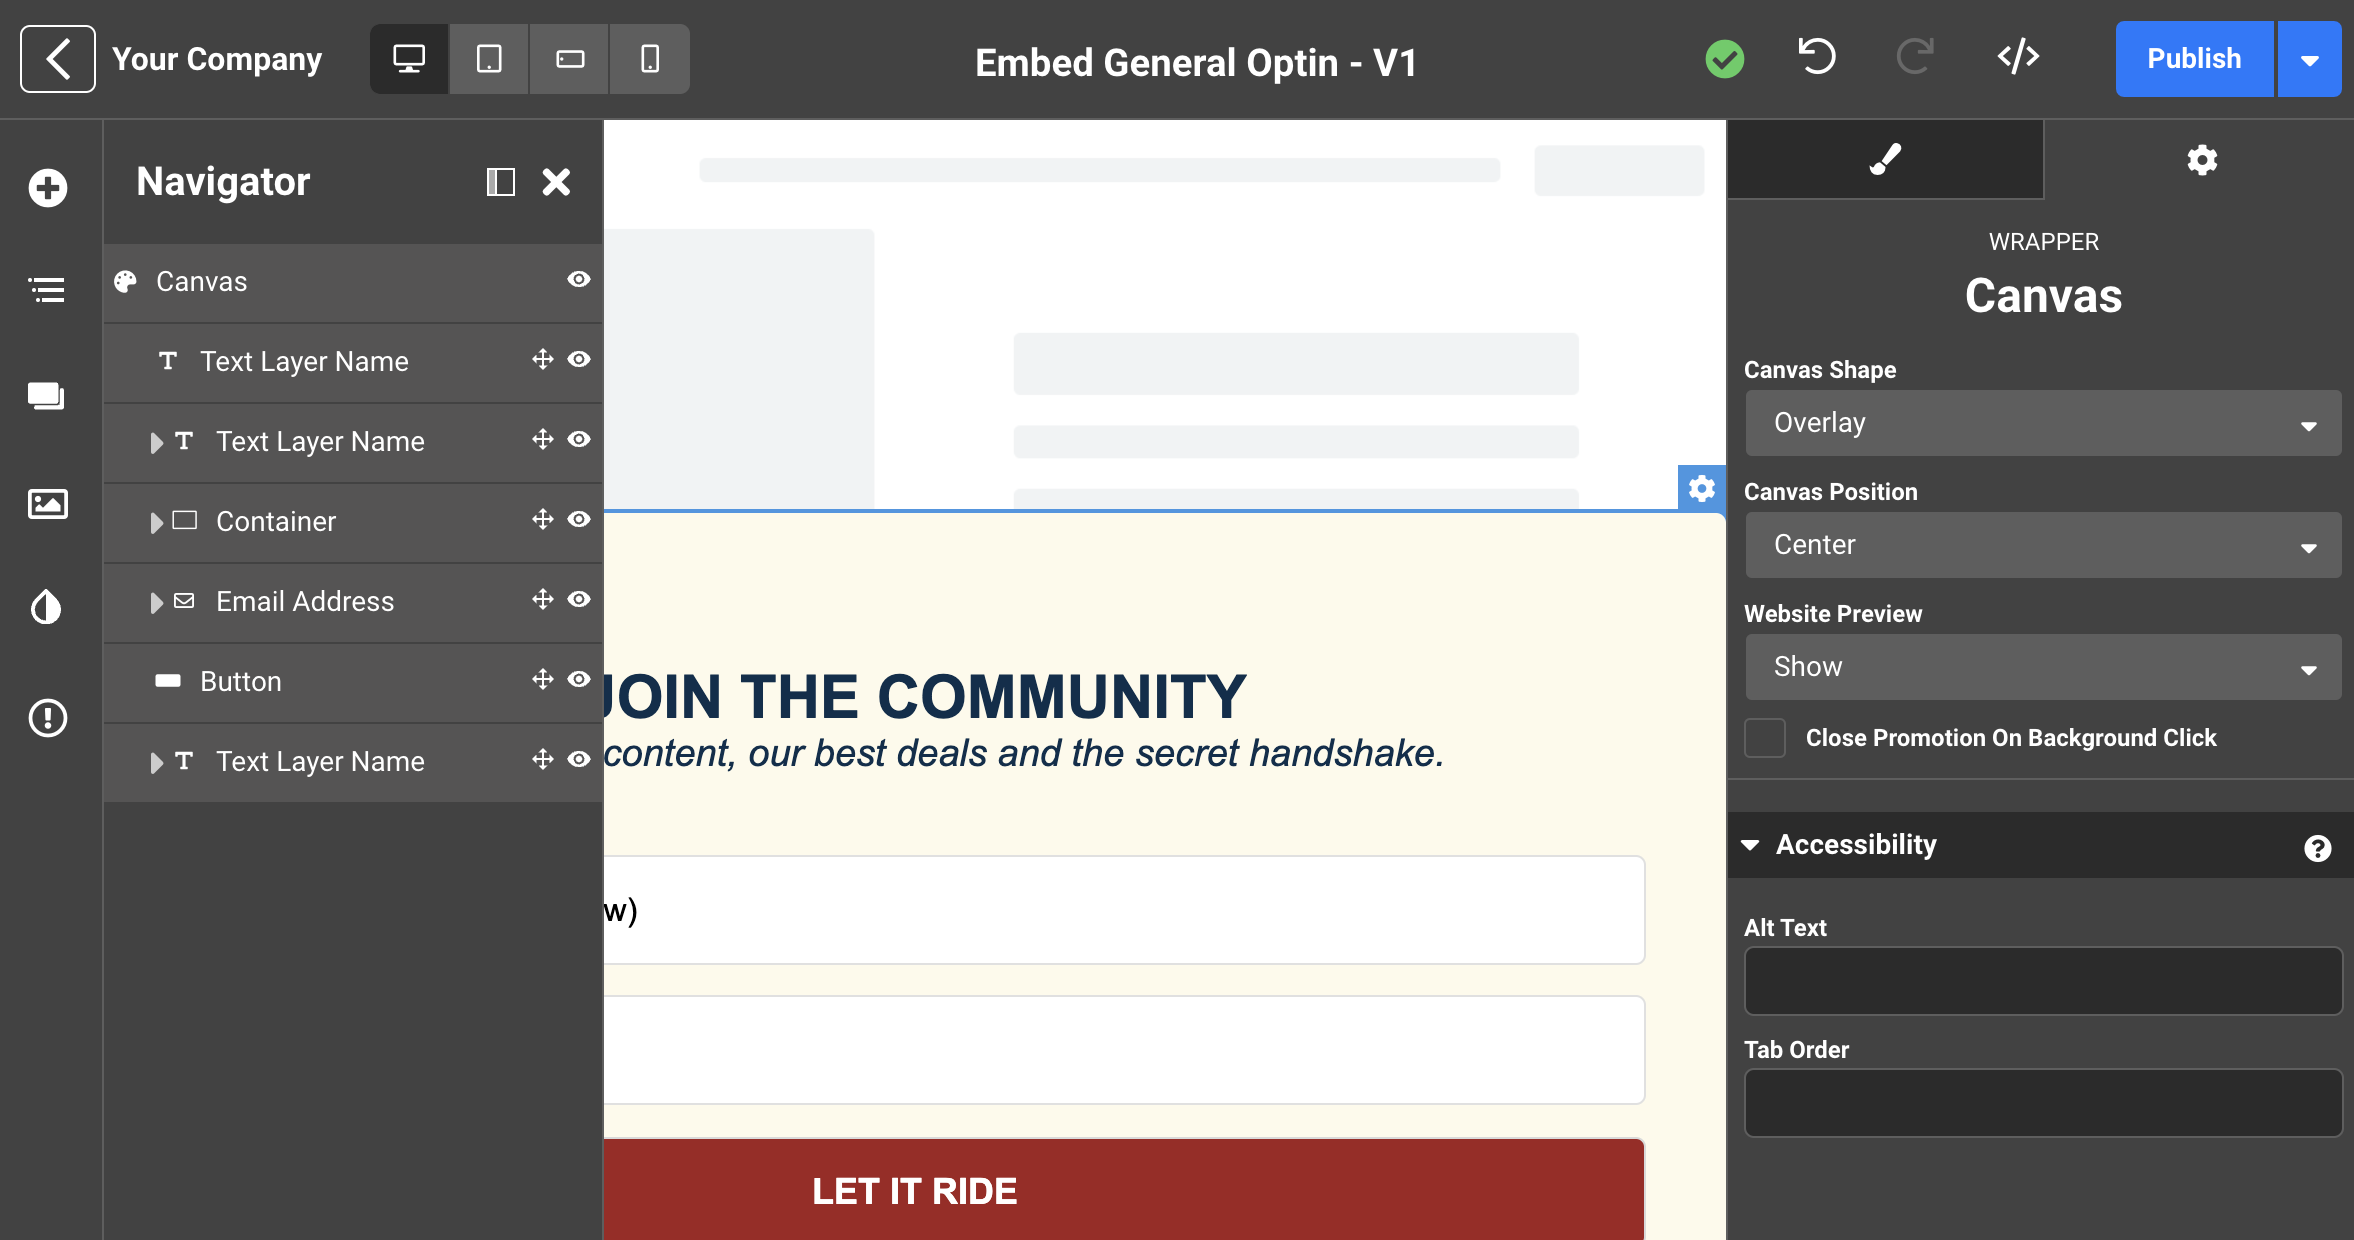
First, you'll need to confirm that your design canvas settings have the "Canvas Shape" set to "Embedded element". The simplest way to check is to open the layer navigator on the left and click the Canvas layer (the first layer). Then on the right click the settings cog icon. If the canvas shape is set to something else, the "Embed In-page" option will not be available on the next step.
Workflow Step Settings
Next, either create a workflow for this use case or edit the one you already have and add/select the design step you want to embed into your page. From the settings on the right, choose "Embed In-page". Next choose how you want to embed this into the selected "Page Element".
Your choices are the following:
- Replace
This choice will replace the contents of the selected html element on your site entirely with the Justuno design. - Place outside above
This will place the Justuno design outside and above the selected html element. - Place outside below
This will place the Justuno design outside and below the selected html element. - Place inside above
This will place the Justuno design inside and above the selected html element. - place inside below
This will place the Justuno design inside and below the selected html element.
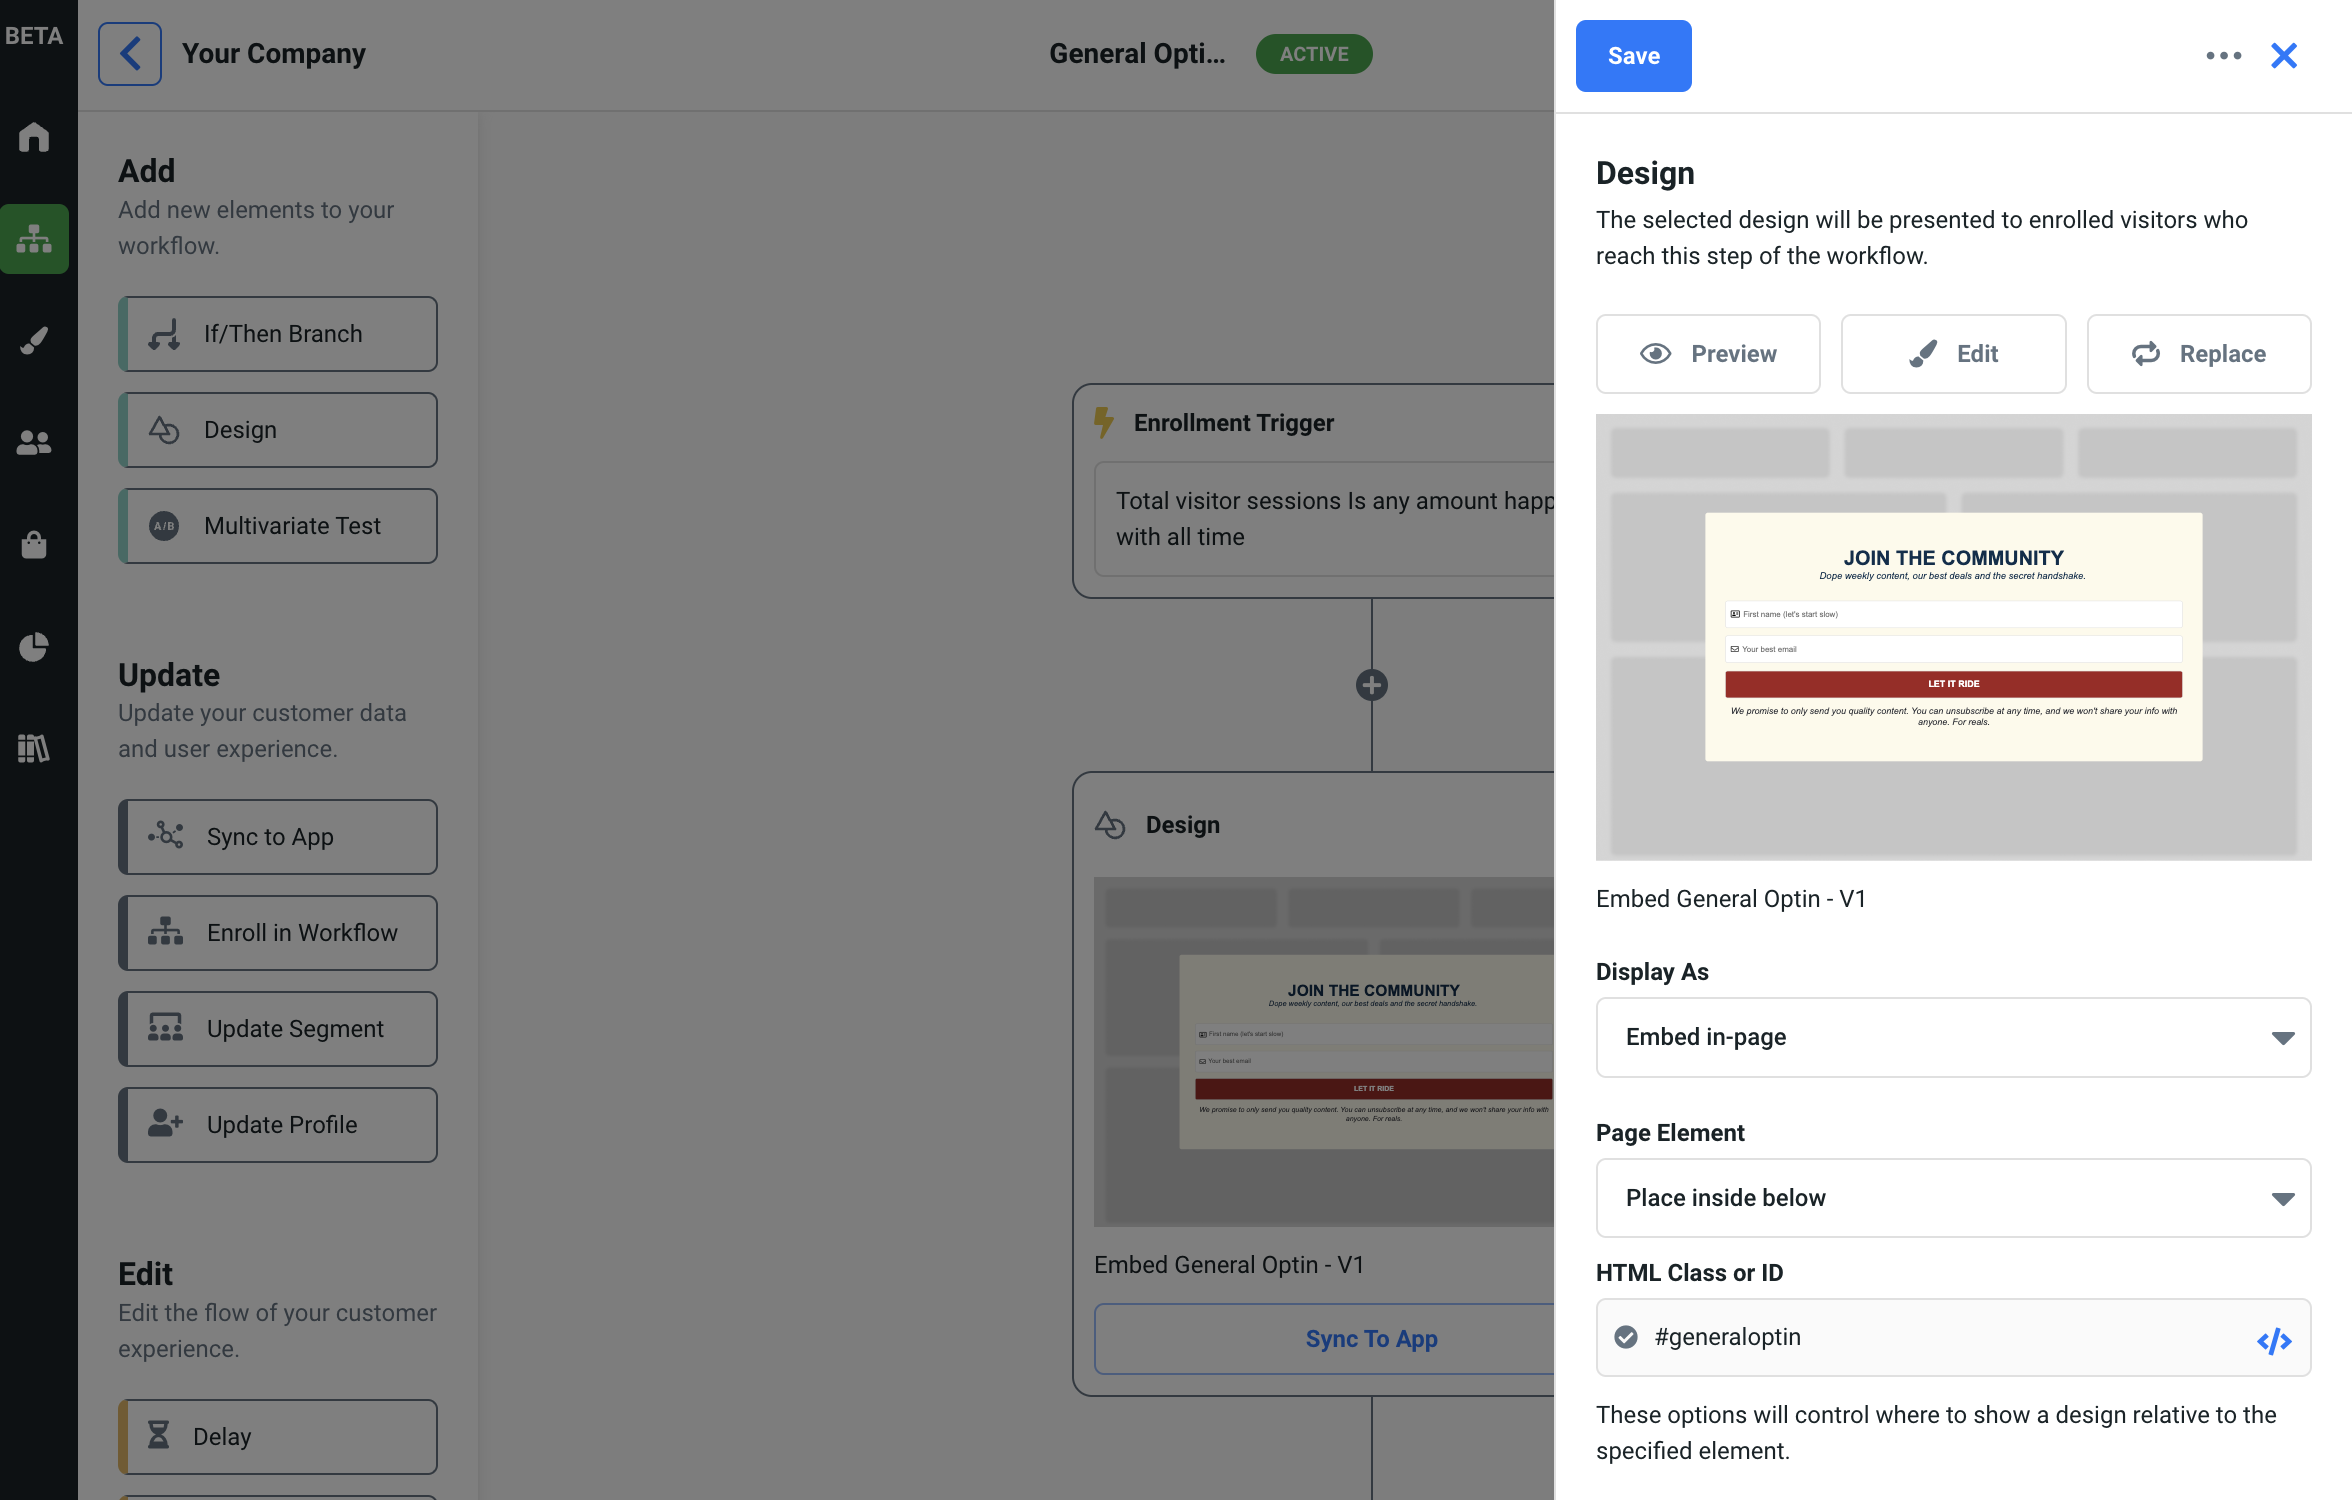
The final step is to enter a selector for the html element you want to embed this in-page design into in the "HTML Class or ID" field. You have two choices; You can either manually enter it or you can click the icon to the right of the field and click on the section of your site you want to replace.
Let's discuss each option more:
- Manual entry requires some knowledge of what selectors are. These are commonly used if you or your dev have ever built or even just maintained any HTML or CSS. Web pages are just made of of many html elements. All HTML elements can be then styled or manipulated by referencing a selector that matches them. Some examples of common selectors are Type, class, and ID selectors. Further education on selectors is better left to the vast amount of knowledge already available via google. Here's a good exampe. But do note that if your selector matches more than one element, it will embed the design in the first matching element it finds.
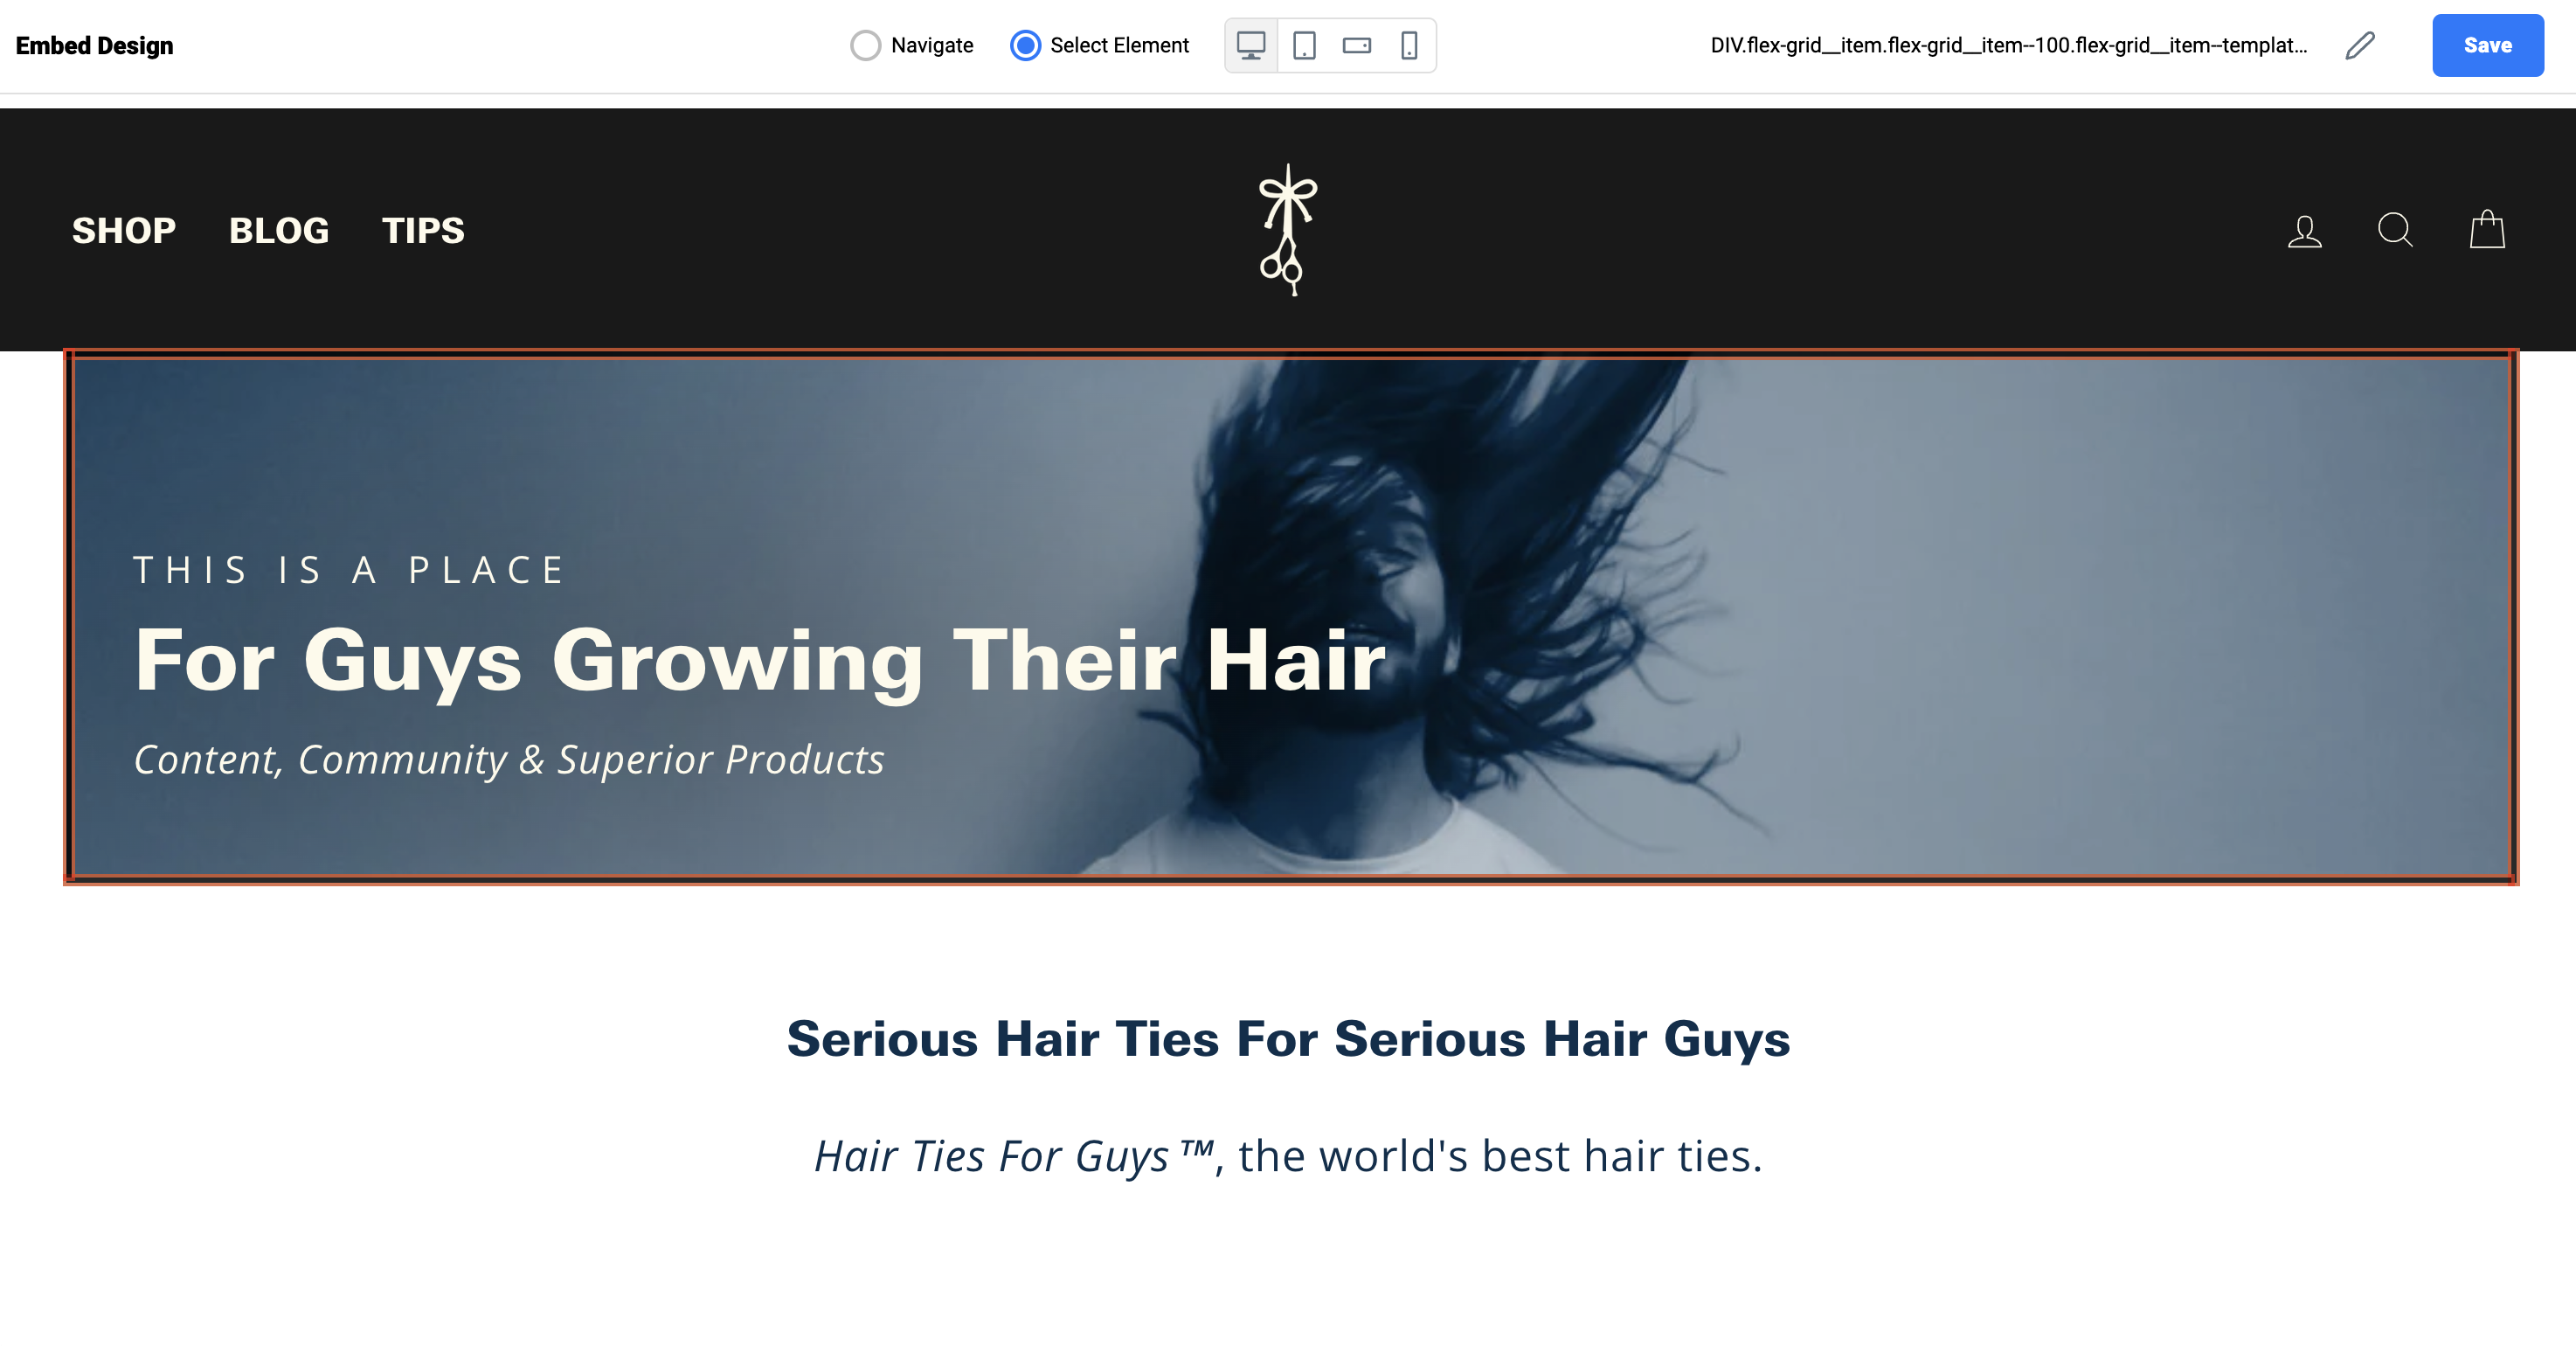
- Using the HTML selector tool is generally far easier and should work well 90% of the time. Once you click this icon, it will open a new window to your website, but it will load up a special script so that as you run your mouse over each element on your site it will highlight it allowing you to choose and return the selector you chose to the input field. In the screenshot below, I have clicked the main hero image, next I would click the "Save" button which will return me to the previous workflow step settings with my new selector added.
Alternatively, if you needed to navigate to another section of your site to choose the appropriate element, you would first click the "navigate" radio button to put it in navigation mode and then proceed to the section you want and make sure to reselect the "select element" radio button to proceed.