How to Populate Viewed-Product Data
This article covers how to populate viewed-product data for use in targeting logic. This is only required if you are not using the Justuno app install route and wish to use the Products Viewed targeting rule.
On this page:
How to manually populate itemsViewed
Testing manually in the console
How to use this within an enrollment trigger.
Automatic platforms
The following platforms are automatically detected, and viewed-product data is populated for you with no additional setup required:
- Shopify
- BigCommerce
- Magento 2
- WordPress/ Woocommerce
If your store runs on one of these platforms, you don't need to do anything further — this article is only relevant to custom sites or platforms not listed above.
Introduction
Justuno's Products Viewed targeting logic relies on some gathered info from one's site to ensure that _jst.profile.itemsViewed shows the item data. On supported platforms, this is populated automatically. On custom-built or unsupported platforms, merchants need to pass the viewed product's ID to Justuno manually before the embed code loads.
How to manually populate itemsViewed
For any other platform (including fully custom-built sites), you'll need to manually set a variable containing the current page's product ID before the Justuno embed code runs.
window._juprodId = "productid";
Replace "productid" with the actual product ID for the page the visitor is viewing ("this ID typically comes from your product database or template variables. Check with your dev team if unsure").
When this variable is set correctly, Justuno will pick it up and populate _jst.profile.itemsViewed for you. This is the supported way to feed viewed-product data into targeting logic on custom sites.
Note: the variable is window._juprodId - Directly editing _jst.profile.itemsViewed yourself is not the supported approach. Setting window._juprodId is what the script looks for.
Where to place the code
This snippet must run before the Justuno embed code loads on the webiste/page, so the value is available by the time Justuno initializes. On a product page, that typically means placing it dynamically (via your CMS or templating logic) so productid reflects the correct, current product, then loading the Justuno embed code immediately after.
Testing manually in the console
You can test this by using your browser's developer console, but timing matters, since window._juprodId needs to be set before the Justuno embed code runs on the page.
Step 1: Set the variable before Justuno loads
If you want to test on a live page where the Justuno embed is already loading on page load, you'll need to work quickly, or reload the page and paste the code in immediately so it runs before the embed script initializes. The easiest way to test reliably:
- Open your product page.
- Open the developer console (right-click → Inspect → Console tab, or
Cmd+Option+J/Ctrl+Shift+J). - Paste the following and hit enter as soon as the page starts loading, before the Justuno embed script has had a chance to run:
window._juprodId = "12345";
Tip: if you're having trouble beating the embed code, you can add a temporary breakpoint on the script tag that loads Justuno (in the Sources tab of dev tools), refresh the page, set window._juprodId in the console while execution is paused, then resume. This guarantees the variable is set before Justuno's code runs.
Step 2: Confirm it was picked up
After the page (and Justuno embed) has fully loaded, go back to the console and check the profile object:
_jst.profile.itemsViewed
If everything worked correctly, this should return an array/object that includes the product ID you set in window._juprodId . If it comes back empty or undefined, double-check that:
- The variable name is exactly
window._juprodId(with the leading underscore). - It was set before the Justuno embed code executed, not after.
- You're testing on a page/platform that isn't already covered by an automatic integration (Shopify, BigCommerce, Magento, WordPress), since on those platforms this value is populated a different way.
How to use this within an enrollment trigger.
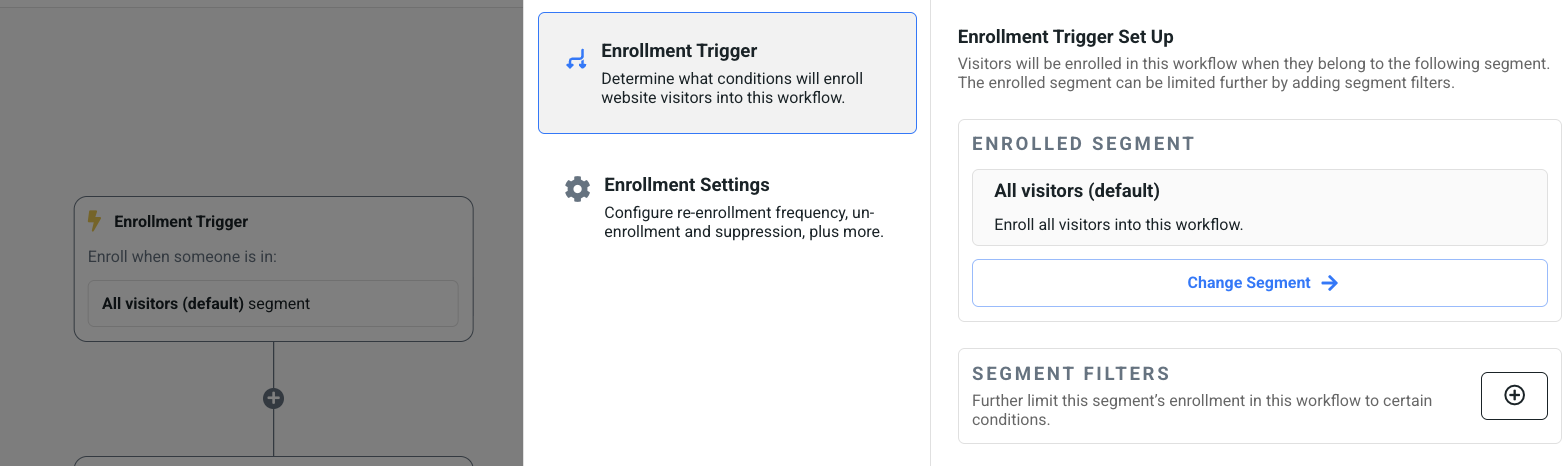
- Within the Workflow builder, click the Enrollment Trigger box.
- Either click the Plus icon to the right of Segment Filters or the Add More Filters button at the bottom.
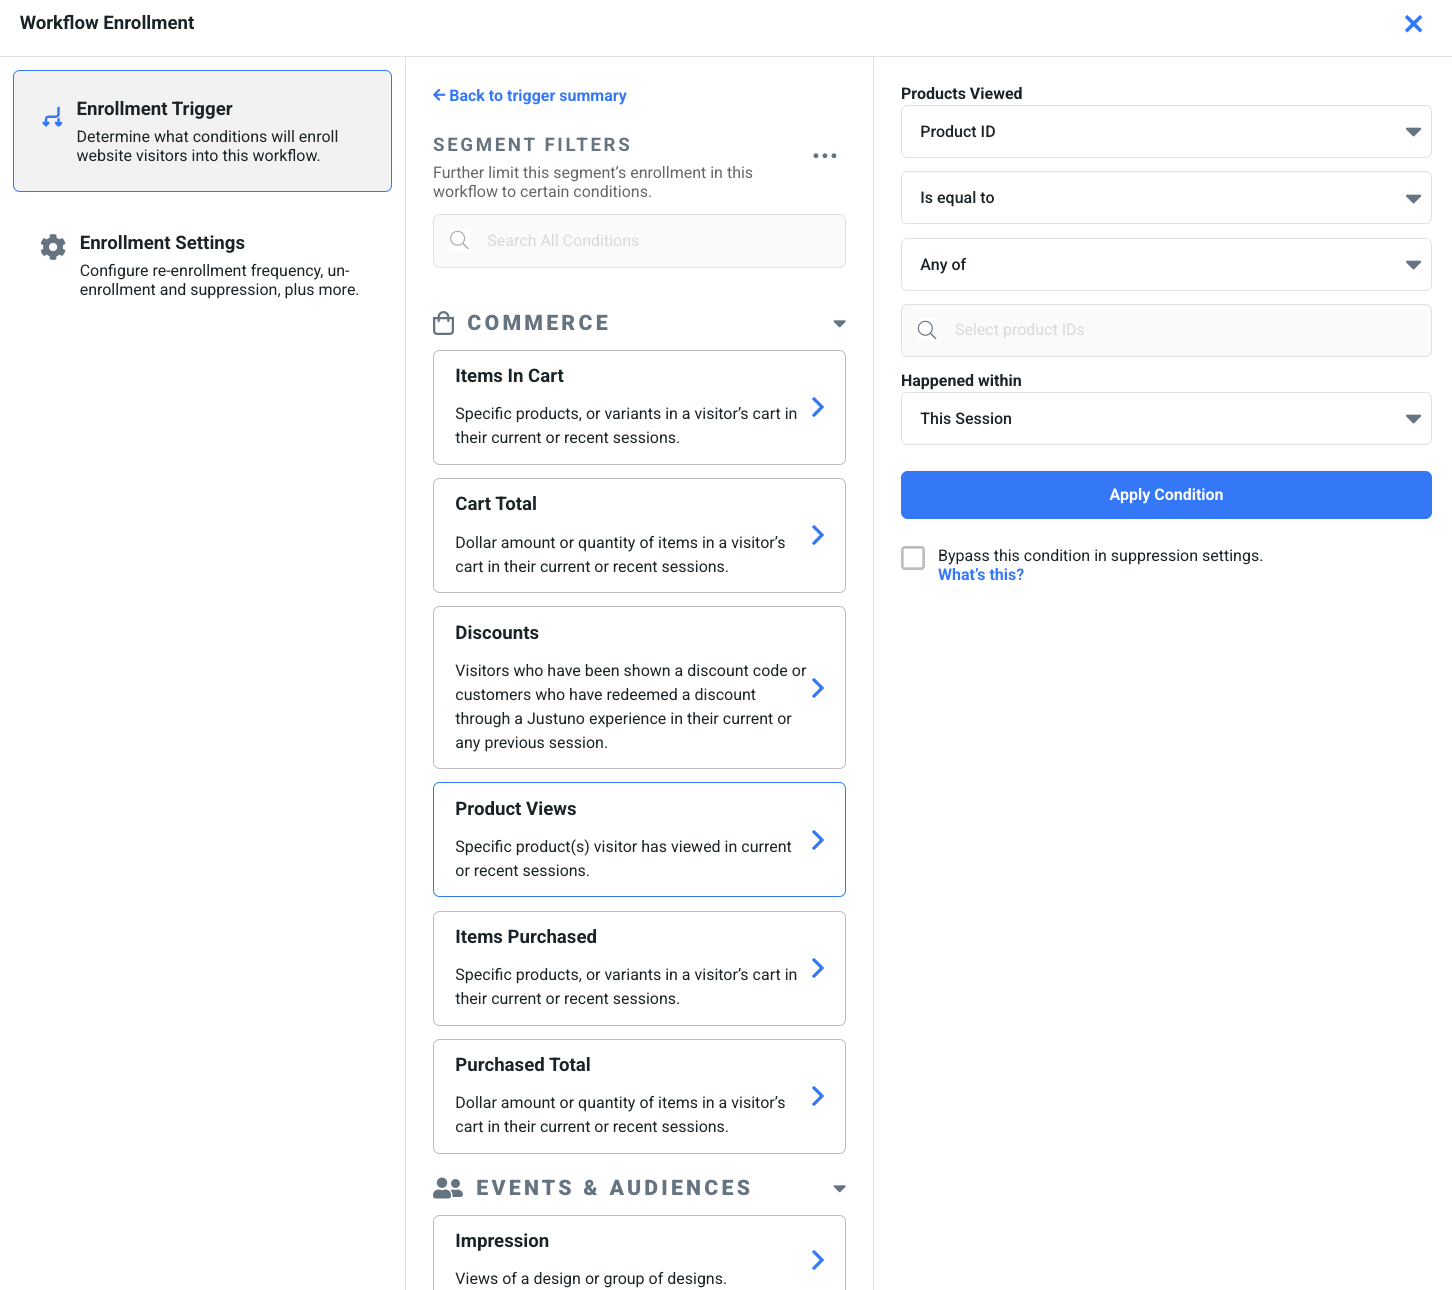
- Select Product Views and use the Product ID from the first drop-down.
- You can then select the desired IDs you wish to review.